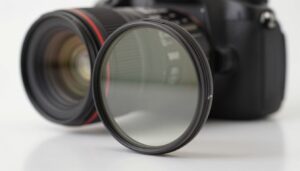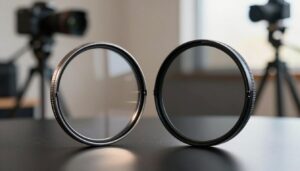
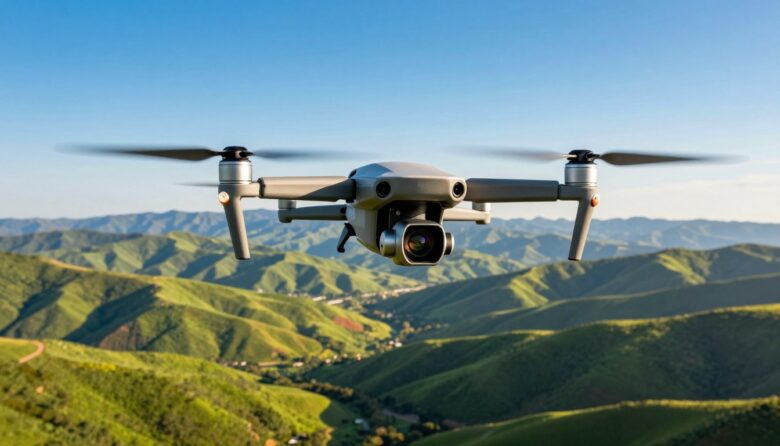
ND filters help DJI drone operators maintain a deliberate shutter speed when daylight is too bright for the selected frame rate, ISO, aperture, and recording profile. This can create more natural motion blur in moving ground detail, vehicles, waves, and subjects while preventing exposure from being controlled only by an extremely fast shutter.
The filter does not make footage cinematic by itself. Smooth aircraft movement, controlled yaw, careful gimbal operation, consistent white balance, useful composition, safe flight planning, and thoughtful color grading remain equally important.
Best general choice: use a lightweight fixed-ND set made specifically for the exact drone and camera module you own.
Best starting strengths for video: ND8, ND16, ND32, and ND64 cover many daylight conditions, although selected DJI models use different official progressions such as ND8/32/128 or ND16/64/256.
Most important warning: filters for Air 3, Air 3S, Mini 4 Pro, Mini 3, Mavic 3 Pro, Mavic 4 Pro, Avata 2, and DJI Flip are not automatically interchangeable.
What an ND Filter Does on a Drone
A neutral density filter reduces the light reaching the camera without requiring an immediate change to frame rate, shutter speed, aperture, or ISO.
Many compact drone cameras use a fixed aperture, so the operator has fewer exposure controls than with an interchangeable-lens camera. After frame rate, shutter speed, and ISO have been selected, ND filtration may be the most practical way to control excessive daylight.
On a drone with an adjustable aperture, aperture can also control brightness. However, changing it may affect diffraction, depth of field, lens performance, or visual consistency between shots. An ND filter can keep the aperture closer to the intended setting.
ND Controls Light
It helps maintain a selected exposure time instead of allowing the shutter to rise to an extremely fast value in bright conditions.
Motion Blur Comes from Shutter Speed
The filter enables the shutter speed. The filter itself does not directly create smooth motion.
Dynamic Range Does Not Increase
ND can prevent overexposure at the desired settings, but it does not add sensor dynamic range or restore clipped highlights.
Flight Movement Still Matters
Abrupt yaw, fast gimbal tilts, unstable wind response, and poor route planning remain visible even with ideal motion blur.
An ND filter does not repair vibration or “jello.” Wavy or vibrating footage should be investigated for damaged propellers, poor mounting, gimbal problems, wind, rolling-shutter behavior, or mechanical vibration.
Understanding the 180-Degree Shutter Guideline
A common filmmaking starting point is to use an exposure time approximately twice the frame-rate interval. This is often described as a 180-degree shutter.
This is a creative guideline, not a mandatory rule. A faster shutter may be preferable for rapid FPV flight, sports, inspection work, tracking fast subjects, frame extraction, stabilization analysis, or scenes where excessive blur reduces detail.
A slower shutter may create heavier blur but can make detailed ground textures, branches, buildings, and moving subjects look smeared. Test the result rather than following one number automatically.
Use 180 degrees as a starting point. Choose the final shutter speed according to aircraft speed, subject movement, altitude, focal length, intended playback speed, and the texture visible in the scene.
Top ND Filter Options by DJI Drone
DJI ND8/16/32/64 Filter Set
The official four-filter progression covers three through six stops, making it suitable for changing daylight and planned cinematic shutter speeds.
Because the Mavic 4 Pro uses a specialized multi-camera assembly, choose a filter engineered for that exact model. A filter intended for an earlier Mavic camera should not be assumed to fit.
DJI ND8/32/128 Filter Set
DJI’s official Air 3S set provides three, five, and seven stops of reduction. It is a broad progression intended to cover several daylight levels without carrying many individual filters.
Third-party split-ND systems can use different densities across the wide and tele camera areas to account for differences in their optical paths. Confirm the exact filter values and test exposure on both cameras before launch.
DJI ND16/64/256 Filter Set
The official set provides four, six, and eight stops, which is useful in bright conditions and for long-exposure timelapse work.
Filmmakers who need a lighter ND8 option for golden hour or overcast conditions can consider a model-specific third-party set. PolarPro offers an ND8/32/128 Shutter Collection, while broader Freewell kits include additional densities.
DJI ND8/16/32/64 Filter Set
The official filter assembly is made for the complete tri-camera system. It is a dependable general set for three through six stops of reduction.
PolarPro offers separate plain-ND and ND/PL collections. Plain ND is generally easier for shots that change heading, while ND/PL is useful when the route and reflected surfaces are controlled.
DJI ND8/16/32/64 Filter Set
The official progression covers common daylight video conditions and is engineered for the Air 3 dual-camera module.
Air 3 and Air 3S filters should not be treated as interchangeable. Their camera assemblies and accessory designs differ even though both drones use a dual-camera concept.
DJI ND8/16/32 Filter Set
Three through five stops provide useful control in bright FPV environments without immediately forcing an extremely slow shutter.
For fast flight, a strict 180-degree shutter may produce too much ground blur. Compare 180-degree footage with a moderately faster shutter before choosing the final filter.
DJI ND16/64/256 Filter Set
The official set is designed for strong light and longer exposures. Because the lightest included filter is ND16, it may be stronger than necessary in shade, overcast weather, or late-day light.
Remove the filter when available light falls rather than raising ISO unnecessarily to compensate for excessive density.
DJI ND16/64/256 Filter Set
The official strengths target bright light and long-exposure work. A model-specific ND8/16/32 set may provide smaller adjustment steps for general filming.
Do not purchase a Mini 4 Pro set for a Mini 3 simply because both drones belong to the Mini family.
Verified Compatibility Overview
| DJI model | Official filter progression | Important compatibility note |
|---|---|---|
| DJI Mavic 4 Pro | ND8, ND16, ND32, ND64 | Use a filter specifically designed for the Mavic 4 Pro camera assembly. |
| DJI Air 3S | ND8, ND32, ND128 | Air 3S filters must cover its dual-camera module correctly. |
| DJI Air 3 | ND8, ND16, ND32, ND64 | Air 3 filters are not automatically compatible with Air 3S. |
| DJI Mini 4 Pro | ND16, ND64, ND256 | Use Mini 4 Pro filters that support its camera orientation and gimbal movement. |
| DJI Mini 3 / Mini 3 Pro | ND16, ND64, ND256 | The official Mini 3 Series set supports both listed models. |
| DJI Mavic 3 Pro / Cine | ND8, ND16, ND32, ND64 | Use a tri-camera filter made for the Pro assembly. |
| DJI Mavic 3 Classic | ND8, ND16, ND32, ND64 | The Classic uses its own filter design and should not be confused with the Pro set. |
| DJI Avata 2 | ND8, ND16, ND32 | The official set also supports the DJI O4 Air Unit Pro. |
| DJI Flip | ND16, ND64, ND256 | Use the DJI Flip/Lito Series mounting system specified for the aircraft. |
Never force a filter onto a camera housing. Similar dimensions do not confirm compatibility. An incorrect frame can obstruct the gimbal, sit loosely, scratch the camera, appear in the image, or detach during flight.
Which ND Strength Should You Use?
The correct filter depends on measured exposure, not only the weather description. Cloud reflectivity, snow, water, sand, city roofs, altitude, frame rate, ISO, aperture, and recording profile can all change the required density.
| Filter | Reduction | General starting situation | Potential use |
|---|---|---|---|
| ND4 | 2 stops | Dawn, dusk, dark overcast, or higher frame rates | Small exposure correction without excessive light loss |
| ND8 | 3 stops | Golden hour, bright overcast, or moderate daylight | 24–60 fps filming when only moderate reduction is required |
| ND16 | 4 stops | Ordinary bright daylight | General aerial video with controlled shutter speed |
| ND32 | 5 stops | Sunny conditions | Bright landscapes, coastlines, and urban scenes |
| ND64 | 6 stops | Strong sun or highly reflective terrain | Midday filming, water, pale rock, sand, or snow |
| ND128 | 7 stops | Very bright scenes or profiles with higher base ISO | Strong daylight while retaining a relatively slow shutter |
| ND256 | 8 stops | Extremely bright conditions or long-exposure timelapse | Specialized strong reduction rather than everyday filming |
| ND1000 | About 10 stops | Specialized still photography or long exposure | Usually too strong for ordinary real-time drone video |
These are starting points, not exposure guarantees. Set the camera first, view the histogram or exposure warning, and select the filter that places the image near the intended exposure without forcing unnecessary ISO changes.
A Fast Method for Selecting the Filter
- Select the recording format. Choose resolution, frame rate, color profile, and aspect ratio before deciding on filter strength.
- Choose the intended shutter speed. Start near a 180-degree shutter when natural motion blur is desired, then adjust for the actual flight.
- Set the appropriate ISO. Use the camera’s suitable low or base ISO while accounting for the selected standard, HDR, HLG, or log profile.
- Set aperture when the drone allows it. Choose it for image quality and creative requirements rather than using an extreme value automatically.
- Check the unfiltered exposure while stationary. Do this before takeoff or after landing in a safe area.
- Count the required reduction. If exposure must be reduced by five stops, begin with ND32.
- Power the aircraft down before changing the filter. Prevent gimbal movement and avoid working near active motors or propellers.
- Install the model-specific filter fully. Confirm that every clip, tab, magnet, or locking point is seated correctly.
- Restart and observe the gimbal test. Check for obstruction, abnormal movement, vibration, or an on-screen gimbal warning.
- Review exposure again. Verify the histogram, zebras, overexposure warning, ISO, shutter speed, and both cameras on a multi-camera drone.
Dual- and Triple-Camera Drone Filters
Multi-camera drones create an additional exposure challenge because their lenses may use different apertures, focal lengths, sensors, or transmission characteristics.
A filter designed for these drones may use:
- One uniform density across the complete camera assembly
- Different densities positioned over different lenses
- A custom frame that aligns each optical section precisely
- Separate coatings or openings for multiple camera modules
Split-ND systems can help the wide and tele cameras produce more closely matched exposure under a selected setup. However, the values are product-specific and should not be assumed from the number printed on only one part of the frame.
Plain ND Versus ND/PL Filters
Plain ND
- Reduces overall light without intentional polarization control
- Works well when the drone changes heading during a shot
- Produces more consistent skies during orbits and long routes
- Is easier to match across several clips
- Does not specifically remove glare from water or glass
ND/PL
- Combines light reduction with reflection control
- Can reduce glare from water, glass, wet roads, and foliage
- Must normally be rotated before takeoff
- Changes its effect as the drone changes direction
- Can create uneven skies in wide aerial views
An ND/PL filter can be useful for a planned straight flight over water or another reflective surface. It is less predictable during a full orbit, reveal shot, panorama, or route that changes its angle relative to the sun.
The polarizer cannot normally be readjusted in flight. Rotate it on the ground while viewing the camera feed, then consider how the effect will change throughout the planned route.
Are Variable ND Filters Good for Drones?
Model-specific variable ND filters exist, but fixed filters are usually the simpler choice for aerial work.
A VND offers adjustable density, but the drone must still land before a normal filter can be rotated safely. This reduces the advantage compared with using a VND on a handheld camera.
Variable filters also use polarizing elements and may introduce:
- Uneven density at strong settings
- An X-shaped cross-polarization pattern
- Changing color across the adjustment range
- Changing reflections as the drone changes heading
- Additional frame thickness or weight
Use a VND only when it is engineered for the exact drone, remains within the gimbal’s intended load, and provides a tested working range. For repeatable productions, a labeled fixed-ND set is generally easier to document.
How to Install a Drone ND Filter Safely
- Land in a clean, stable location. Avoid changing filters above sand, loose gravel, water, or long grass.
- Power the aircraft off. Confirm that motors, propellers, camera, and gimbal are inactive.
- Remove the gimbal protector carefully. Do not use the protector as leverage against the camera.
- Support the camera assembly lightly. Follow the filter manufacturer’s installation direction without forcing the gimbal.
- Hold the filter by its frame. Avoid touching the optical surfaces or pressing directly on the lens.
- Align every attachment point. Tabs, clips, magnets, or snap joints must engage completely.
- Confirm that the filter sits flat. An angled or loose frame may detach or interfere with gimbal movement.
- Power the drone on and watch the gimbal initialization. Stop and reinstall the filter if the camera catches, vibrates, or reports an error.
- Check the live image. Inspect every corner and every camera view for obstruction, haze, fingerprints, and uneven exposure.
- Perform a short low-risk test. Confirm gimbal response and image stability before beginning the important route.
Never change a filter while the motors are running. Do not hold the camera against an active gimbal or place fingers near powered propellers.
Camera Settings for Cinematic Aerial Footage
Use Manual or Controlled Exposure
Automatic exposure can change shutter speed or ISO during a continuous shot, creating visible brightness and motion-blur changes. Manual exposure provides greater consistency when the light remains stable.
In rapidly changing conditions, selected automatic functions may be practical, but monitor which variable the camera is changing.
Lock White Balance
Automatic white balance may shift during an orbit or reveal as the frame includes different amounts of sky, land, water, and sunlight. Use fixed Kelvin or a custom reference when color consistency matters.
Choose the Recording Profile Deliberately
Standard profiles provide a faster workflow, while log or HLG profiles on supported DJI models provide different grading and delivery options. Use the profile that matches your post-production process rather than selecting log only because it sounds more professional.
Protect Important Highlights
Bright clouds, snow, water reflections, and pale roofs can clip even when most of the scene looks correctly exposed. Use the histogram, zebras, or overexposure warning and evaluate the areas that matter to the shot.
Keep Settings Consistent Between Shots
When several aerial clips will be edited into one sequence, consistent shutter behavior, ISO, white balance, color profile, and exposure make matching easier.
An ND filter should support the exposure plan, not replace one. Decide frame rate, shutter, profile, ISO, and creative movement before selecting filter strength.
Flight Technique Matters as Much as the Filter
How to Test a New Drone Filter
- Record an unfiltered reference. Use fixed white balance and manual exposure while the drone remains stationary.
- Install the filter and match brightness. Adjust shutter speed by the stated number of stops while keeping other variables consistent.
- Compare fine detail. Inspect roofs, tree branches, text, fences, and ground texture for softness.
- Check color. Compare neutral surfaces, vegetation, sky, water, and dark objects.
- Inspect the corners. Look for frame intrusion, dark corners, uneven density, or flare.
- Test toward strong light. Place the sun near the frame edge without staring at the screen or aircraft in an unsafe way.
- Test every camera. Multi-camera drones require separate evaluation of each lens.
- Fly a short straight route. Examine natural motion blur and fine detail.
- Fly a controlled turn or orbit. Watch for polarization changes, uneven sky, and exposure variation.
- Review the original file. Do not judge optical quality only from the controller’s live preview.
What to Look for Before Buying
Common Mistakes to Avoid
Preflight Filter Checklist
Frequently Asked Questions
Do I need an ND filter for every drone flight?
No. Use ND when excessive light prevents the shutter speed or aperture required for the intended result. Remove it in low light or when a faster shutter is desirable.
Which ND filter is best for sunny drone video?
ND16, ND32, or ND64 are common starting points, but the correct choice depends on frame rate, shutter speed, ISO, aperture, profile, and scene reflectivity.
Is ND32 always correct for midday?
No. Snow, water, sand, clouds, altitude, camera profile, and frame rate may require a lighter or stronger filter. Confirm exposure on the actual camera.
Can I use an Air 3 filter on an Air 3S?
Do not assume compatibility. Purchase a filter whose manufacturer explicitly lists the exact Air 3 or Air 3S model you own.
Can Mini 3 filters fit the Mini 4 Pro?
They should be treated as different systems. Use a product specifically listed for Mini 4 Pro or for Mini 3 and Mini 3 Pro as applicable.
Should I buy official DJI filters or third-party filters?
Official sets provide clearly documented DJI compatibility. Third-party brands may offer additional densities, ND/PL, split ND, mist, or specialized options. Fit and image quality should be tested regardless of brand.
Is PolarPro better than DJI filters?
Neither brand is automatically best for every workflow. Compare density selection, plain ND versus ND/PL, fit, optical behavior, storage, and cost for the exact drone.
Are Freewell split ND filters useful?
They can be useful on supported dual-camera drones because different filter sections can be tailored to different lenses. Verify the stated values and exposure on both cameras.
Should I use ND/PL over water?
It can reduce glare, but the result changes with camera direction. Use it when the flight route and desired reflection level are predictable.
Why does the sky change during my orbit?
An ND/PL or other polarizing filter may produce different sky intensity as the drone changes angle relative to the sun. Plain ND is usually more consistent for a full orbit.
Is a variable ND useful on a drone?
It offers adjustable density, but normal adjustment still requires landing. Fixed filters are usually lighter, more repeatable, and less vulnerable to cross-polarization artifacts.
Does an ND filter remove jello from drone footage?
No. Investigate propellers, vibration, gimbal condition, wind, mounts, and rolling-shutter behavior. ND changes exposure time and may only change how vibration appears.
Does ND improve dynamic range?
It does not increase the sensor’s dynamic range. It helps prevent overexposure while preserving selected camera settings.
Should I use 1/50 second at 25 fps for every shot?
It is a useful cinematic starting point, but faster aircraft movement, nearby foregrounds, action, or frame extraction may benefit from a faster shutter.
Why is my footage blurry after installing ND?
The filter may be too strong, the shutter may be too slow, the lens may be contaminated, the filter may reduce sharpness, or aircraft movement may be creating excessive motion blur.
Can I leave the filter attached during storage?
Follow the drone and filter instructions. Some camera protectors may not fit with a filter installed, and leaving glass exposed can increase the risk of scratches or contamination.
Do I need ND for drone photography?
Not for most ordinary still photographs. ND becomes useful for long exposures, motion effects, timelapse, or situations where a particular aperture and shutter combination must be maintained.
Final Recommendation
Begin with a model-specific fixed-ND set that covers the daylight conditions in which you normally fly.
For Mavic 4 Pro, Mavic 3 Pro, Air 3, and similar production-oriented systems, an ND8/16/32/64 progression provides useful three- through six-stop control. Air 3S users can begin with DJI’s ND8/32/128 set or evaluate a compatible split-ND system when matching its two cameras is a priority.
Mini 4 Pro, Mini 3 Series, and DJI Flip official sets provide stronger ND16/64/256 filtration, which is useful in strong light but may require a lighter third-party option for overcast weather or golden hour.
Use plain ND for the most predictable motion and color during complex flight paths. Reserve ND/PL for planned reflective scenes, verify every camera before takeoff, and remember that smooth flying and consistent camera settings contribute more to a professional aerial sequence than the filter brand alone.
The OptiFilter Labs Editorial Team creates practical, carefully researched content about ND filters, camera accessories, exposure control, photography techniques, and video production. Our goal is to help photographers and filmmakers understand their equipment, solve common problems, and make more informed purchasing decisions.