I’ve spent years refining my photography workflow so every shot keeps true tones and solid exposure. When you add a neutral density piece to the lens, a strange tint can appear and ruin an otherwise clean image.
In this short guide I’ll show the best way to fix ND filter color cast issues so you spend less time in post and more time shooting. I explain camera settings that matter and how to approach white balance before you press record or take the shot.
The simple habit that helped me avoid color issues before shooting
For a long time, I relied on fixing color problems later in editing, thinking it was just part of the process. But after dealing with inconsistent results across different shoots, I realized that most of those issues could have been reduced before even taking the shot. That shift in mindset saved me a lot of time and made my results more predictable.
From my experience, the biggest improvement came from doing quick checks on location. I started paying more attention to white balance and how my filter behaved under different lighting conditions. It wasn’t anything complicated—just a few seconds of testing before starting—but it made a noticeable difference in how clean my images looked.
I learned that small checks before shooting are often more effective than heavy corrections later.
If I could give one practical tip, it would be this: always capture a quick reference frame with a neutral surface before your main shots. It gives you a reliable point to correct color if needed and helps you spot problems early.
In the end, achieving consistent color isn’t about perfection—it’s about building simple habits that reduce problems at the source and keep your workflow efficient.
Whether you work on professional video or still images, understanding how a variable filter changes density and hue is the first step to correction. I’ll also cover quick camera tricks and practical checks to prevent the problem from showing up in your final work.
Thanks for joining me — by the end you’ll have a clear plan to keep gear reliable and colors true.
Key Takeaways
- Learn simple camera checks to reduce unwanted tint.
- Set white balance before you shoot for faster post work.
- Understand how neutral density and variable filter elements affect exposure.
- Use quick correction steps to save time in post production.
- Follow a short checklist to keep images and video consistent.
Understanding Why ND Filters Cause Color Casts
I want to make the technical bits simple. Extra wavelengths like infrared and ultraviolet can pass through glass and change what your sensor records. This is often the root of a strange tint in long exposures and high-density setups.
The Role of IR and UV Light
Many photographers find that neutral density pieces let IR and UV reach the sensor. When shutter speeds get very long, those invisible rays build up and shift tones.
For example, when I tested my B+W ND 1000x F-Pro 110 SH, a strong red-ish tone appeared in several frames. The Lee Big Stopper shows the opposite effect; it often produces a blue tint during long exposures because of UV leakage.
Impact of Filter Quality
Quality matters, but it isn’t a guarantee. Expensive glass can still introduce a tint. A variable filter can be especially tricky since rotating elements change the density and the resulting tint over different settings.
This is a common problem for a photographer using a 10-stop piece: long shutter speeds, shifting light, and small optical quirks add up. Understanding light leakage and how your lens, camera, and accessories interact is a crucial step toward reliable color balance.
“Learning the role of IR and UV is a bit like learning a new language, but it pays off fast in better images.”
How to Fix ND Filter Color Cast in Post-Production
When I bring images into my editor, the first tool I reach for is the white balance picker. It is the fastest way to neutralize an unwanted tint and restore natural skin tones and skies.
I then refine the correction with sliders. I nudge midtones and highlights until the image reads neutral. Small moves often save an entire shot without harming exposure.
For video projects, I apply a correction preset across all clips. This keeps consistency and cuts down editing time. When a single frame still needs work, I isolate it and use selective sliders or a dedicated color correction tool.
- I watch for variation by density; each filter setting may need a slightly different balance.
- If a strong tint appears, careful white balance and channel tweaks usually recover original colour.
- Using a trusted correction tool preserves detail while you correct many images at once.

“A few minutes in post can turn a problematic case into a natural, publish-ready image.”
Advanced Techniques for Color Correction
Advanced correction tools let me target specific channels to remove unwanted tint while keeping detail.
Using the Channel Mixer
I use the channel mixer to tweak red, green, and blue independently. This helps me neutralize a persistent tint from a variable filter without harming exposure.

Spot Color Mapping
Spot mapping lets me pin a problematic hue and shift only that area. I apply small moves so skin tones, skies, and highlights stay natural.
Creating Custom Presets
After I dial in channel and spot edits, I save a custom preset. That preset speeds up post work on large batches of images or long video shoots.
- Target channels to neutralize a tint from a variable filter.
- Use spot mapping to preserve true balance in tricky areas.
- Save presets to keep results consistent across lenses and sessions.
- Aron J Anderson recommends the Genustech Eclipse for better image quality with fewer hue issues.
“Advanced correction is about ensuring every image reflects the scene—consistent, true, and ready to share.”
Testing Your Gear for Neutrality
Before a shoot, I run simple tests to make sure my gear records neutral tones.
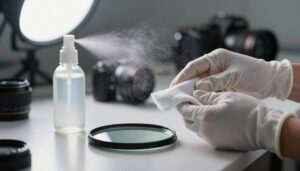
I start by photographing a plain white wall at base ISO and my usual shutter speed. This reveals any unwanted tint from a neutral density piece or the general setup.
I then check white balance in-camera and note any shift. I shoot the same scene with and without the filter to compare channel levels.
Next, I test across several stops and longer shutter speeds to see if the issue grows with density. Even high-end glass can show a bit of tint, so I log the result.
- I compare images side-by-side to spot a change in color balance.
- I note which stops or speeds make the problem worse.
- These quick checks tell me what kind of correction my post workflow will need.
| Step | What to Watch | Settings | Expected Result |
|---|---|---|---|
| White wall shot | Tint or hue shift | Base ISO, normal shutter | Neutral grey/white |
| With vs without | Channel differences | Same exposure | Clear comparison |
| Multiple stops | Worse at long exposures | Increase stops, slow shutter | Trend identified |
| Log & repeat | Consistency over time | Different light conditions | Reliable notes for correction |
“Testing your neutral density pieces is the best way to know what correction you’ll need later.”
Proactive Strategies to Prevent Future Issues
A simple workflow change can save time and keep tones true. I often suggest stacking shorter exposures instead of relying on a single long exposure with a heavy filter.
Why it works: multiple short frames reduce light leakage that creates a color cast in long shots. You control shutter speed and exposure time more precisely, and you limit the amount of stray light that builds on the sensor.
Practical stacking tips
- Shoot a series of identical images at shorter shutter speeds and combine them in post.
- Try Andy Dodd’s pyimageconvert tool to speed up stacking and alignment. This tool helps any photographer process images faster.
- Use your camera’s built-in burst or interval features if available; many modern cameras simplify this workflow.
- Run a quick test at different stops and speeds to see how exposure and light affect the final image.
“Stacking is a reliable way to maintain high quality while avoiding long-exposure quirks.”
Final Thoughts on Achieving Perfect Color Balance
, True-to-life images come from a mix of good technique, careful testing, and smart post work.
I encourage steady testing and a simple checklist. Shoot tests, note white balance settings, and record how each filter affects an image.
Keep corrections small and consistent so your post workflow stays predictable. For video or stills, repeatable steps save time and protect tonal integrity.
Every piece of glass behaves differently, so patience pays. Thanks for following along — with practice you will master balance and handle any color cast with confidence.
FAQ
What causes a tint when I use neutral density glass on my lens?
Several factors can introduce a tint: low-quality glass or coatings, variable designs that use polarizing layers, and the way infrared or ultraviolet light interacts with the media. Light source type and angle can make the effect more apparent, and some cheaper products shift hues as you change stops or rotate the element.
How can I tell if my hood, lens, or camera body is adding a tint?
I make a controlled test: shoot a neutral gray card or a white wall at different exposures, then compare raw files without any post tweaks. If colors shift noticeably between frames with and without the accessory, that part is likely the culprit. Also check for vignetting or reflections that might skew hues.
What’s the quickest way to correct a tint during post-production?
I usually start with white balance and then use a curves adjustment to nudge midtones toward neutral. If the tint is uneven, selective color or HSL tools can target specific hues. Working on raw files gives more latitude; if I’m editing JPEGs, I rely on local adjustments and color balance layers.
When should I reach for the channel mixer instead of a basic white balance tool?
I use the channel mixer when the shift affects one RGB channel more than the others or when neutralizing with white balance ruins contrast. It gives precise control over how much red, green, or blue contributes to each output channel, which helps restore neutrality without flattening the image.
Can spot color mapping really remove a stubborn hue without harming skin tones?
Yes—when done carefully. I sample the problematic hue and shift only that range, preserving neighboring colors. Working with masks and feathering protects skin tones and highlights. It’s slower, but it keeps natural saturation where it matters most.
How do I build a reliable custom preset for tint corrections?
I create a preset from a corrected raw file that represents my camera and glass pairing. Start with white balance, exposure tweaks, and any channel mixer settings that consistently work. Save the settings without scene-specific edits, then fine-tune per image. Keep a few presets for different light conditions.
What tests should I run to confirm a piece of gear is neutral?
I photograph a gray card, a white card, and a color chart under daylight and tungsten sources, across several exposure stops. I inspect raw histograms and compare channel balance. Repeating tests at different rotations or positions helps reveal issues like polarization-induced shifts.
Is stacking multiple elements more likely to introduce a hue shift?
Yes. Each layer adds another surface where reflections or imperfect coatings can alter wavelengths. I prefer single high-quality elements or use shorter exposures stacked in-camera rather than piling on glass.
How do shutter speed and exposure time influence tint severity?
Longer exposures can amplify infrared contamination and sensor heating, which may push colors toward warm or magenta tones. I monitor exposure times and consider infrared-cut solutions or post raw adjustments for long exposures to control the effect.
Are variable models more prone to producing uneven tints across the frame?
In my experience, variable types that change density by rotating polarizing layers often introduce uneven shifts, especially at extreme settings. Solid neutral-density panes generally behave more predictably if they’re well made.
Which camera brands or sensors handle wavelength shifts better?
Some sensors include stronger IR filters from the factory; for example, many modern Sony and Canon models balance IR rejection effectively. Still, performance varies by model and generation, so I always test my specific body with the optics I plan to use.
How can I prevent recurring problems during a shoot rather than relying on post editing?
I carry a neutral reference target, use a single high-quality element when possible, and keep exposures within ranges I’ve tested. I also bracket and shoot raw. If I must stack, I test combinations beforehand and avoid extreme settings on variable gear.
What’s the best workflow for long-exposure landscape work to avoid hue shifts?
I limit exposure length when I can, use premium glass with proper coatings, and bracket exposures. I shoot raw, include a neutral target in at least one frame, and run a quick check on the camera’s preview to catch any obvious tint before I leave the location.
Are there affordable tools that help identify and correct wavelength issues on set?
Affordable gray and color charts, a calibrated monitor, and a simple raw editor let me identify problems quickly. For stubborn IR-heavy scenarios, an external IR-cut filter or a camera-specific profile applied in raw conversion helps a lot.
How often should I recalibrate my color workflow to stay consistent?
I recalibrate my monitor monthly and profile any new lens or filter combination as soon as I add it to my kit. Regular calibration keeps my edits predictable and reduces surprises when I batch process large shoots.

Oliver Grant is an optics specialist and photography enthusiast focused on lens filters, light control, and visual precision. He explores how different filters and optical technologies shape color, contrast, and exposure, delivering clear and practical insights to help photographers achieve cleaner, more refined images.