I’m here to make light control simple and practical. As founder of The School of Photography, Marc Newton taught me that clear, hands-on guidance turns tricky gear into creative tools. I’ll walk you through how these adjustments affect exposure so you can plan long exposures with confidence.
This guide covers the mechanics behind each stop, how to calculate exposure reduction, and why certain strengths yield the silky water and motion blur seen in top landscape work. You’ll get concrete tips on gear choices and settings that keep results sharp.
The simple calculation habit that made everything easier
When I first started working with ND filters, I relied too much on apps and charts without really understanding what was happening. It worked, but I often felt slow and unsure in the field. Over time, I realized that having a basic understanding of how stops affect shutter speed made my decisions much faster and more confident.
From my experience, I don’t need to calculate everything perfectly—I just need a clear reference point. Once I understood how doubling exposure works with each stop, I could estimate results quickly and adjust on the fly without interrupting my workflow.
I learned that knowing the logic behind the settings is more valuable than memorizing exact numbers.
If I could give one practical tip, it would be this: practice estimating shutter changes without tools, then confirm with a chart if needed. This builds confidence and helps you react faster when light conditions change unexpectedly.
In the end, understanding the basics of light reduction isn’t about being precise every time—it’s about building intuition so your workflow stays smooth and consistent in real shooting situations.
Read on and you’ll learn to select the right strength for any lighting, measure the exact light reduction needed, and apply practical techniques that improve your images instantly. My aim is to make technical choices feel intuitive.
Key Takeaways
- I explain how stop values convert to exposure reduction so you can plan shots.
- You’ll learn simple calculations to pick the right strength for bright scenes.
- Practical tips on gear and settings help keep long exposures sharp.
- Understanding light control boosts creative options for landscape work.
- By the end, you’ll feel confident choosing the correct strength in the field.
Understanding the Basics of Neutral Density Filters
I’ll show you how a simple sheet of high-quality glass controls the amount light entering your camera and why that control matters for your images.
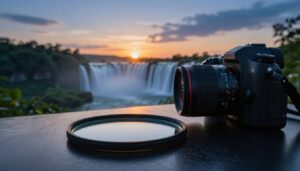
What is an ND Filter
A neutral density piece of glass acts like sunglasses for your lens. It reduces incoming light without shifting color so your exposure stays natural.
Think of it as a way to limit the amount light that reaches the sensor. That lets you use a wider aperture or slower shutter than daylight would normally allow.
“Blocking light forces the camera to expose for a longer period,” — Marc Newton.
Why Light Control Matters
Controlling light gives you creative freedom. You can keep a shallow depth field in bright sun or smooth moving water with a long exposure.
These tools help balance sky and foreground in landscape work and are equally useful when you shoot video or combine different lenses and glass.
- A neutral density piece of glass reduces the amount light entering camera sensors.
- It helps you hold a wide aperture for shallow depth field even in bright conditions.
- Understanding density is the first step toward confident long exposure work.
How ND Filter Stops Explained Works in Practice
When I add a 10-stop neutral density piece to my lens, the camera’s shutter time stretches and moving elements turn into soft layers.
Practically, that means a base shot at 1/30s becomes a 30-second exposure while aperture and ISO stay the same. You only change shutter speed to compensate for the lost amount light entering the sensor.
This 10-step reduction is like halving the light ten times in a row. It forces the camera to hold the shutter open much longer so you get smooth clouds and glassy water.
- I compare the effect to wearing sunglasses for your lens: less light, calmer highlights.
- Always check an exposure table to confirm your exposure time before you shoot.
- Understand the filter factor — it tells you how much to adjust shutter speed.
| Base Shutter | Stops Added | Resulting Exposure |
|---|---|---|
| 1/30 s | 10 | 30 s |
| 1/125 s | 10 | 4 s |
| 1/500 s | 6 | 8 s |
“Use a chart or table to avoid guesswork; adjust speed, not aperture or ISO.”
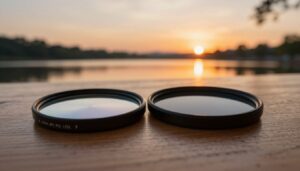
Exploring Different Types of ND Filters
Different designs offer varied trade-offs for image quality and ease of use. I’ll summarize the main options so you can choose what fits your budget and style.
Circular screw-in options
Circular screw-on pieces are the quickest way to get into long exposure work. They thread onto the front lens element and are wallet-friendly—often about £10 or $15.
They’re great for beginners who want a simple tool to cut light and lengthen shutter times without extra gear.
Square and rectangular systems
Box-style holders use rectangular glass that slides into a mount. They cost more but give you flexibility to stack graduated elements to balance sky and foreground exposure.
High-end brands like HiTech, Lee, Nisi, and Cokin make quality glass that reduces color shift and keeps images sharp.
One big advantage: you can reuse the same plates across many lenses by changing adapter rings.
Variable options and practical notes
Variable systems let you dial density continuously, which is handy for video or fast changes in light. I use them for run-and-gun work, but I stay cautious at strong settings.
Marc Newton warns that variable designs can show lines or artifacts when pushed hard, so test yours before committing to a long exposure shot.
- Choose screw-ons for low cost and simplicity.
- Pick a holder system for stacking graduated pieces and pro-level image quality.
- Use variable pieces for convenience in video, but watch for artifacts.
Essential Gear for Long Exposure Photography
Stability and control are the two non-negotiables of successful long exposure work. I always start by mounting my camera on a sturdy tripod to avoid blur from wind or vibration.

Use a solid tripod and add weight to the center column if conditions are gusty. The right tripod keeps the shutter steady for 30-second exposures and longer.
I also carry a cable release or remote trigger so I can use bulb mode without touching the camera. That small step removes most handshake blur.
- Stability: a heavy, well-built tripod resists movement.
- Control: a remote trigger or cable release lets you fire without contact.
- Protection: a reliable bag keeps filters and lenses safe in the field.
“The amount of weight in your tripod is a key factor in keeping your camera steady for 30-second exposures.”
Proper gear management saves trips and keeps my photography sessions productive, even in tough light and weather.
Step by Step Guide to Using Your Filters
Start by composing and locking focus before you darken the front of the lens. The viewfinder will be hard to see once glass is attached, so set framing and focus first.
Setting Up Your Tripod
Mount your camera on a solid tripod and stabilize it. Take a test shot without any filters to record your base shutter speed and exposure settings.
Calculating Shutter Speed
Use a simple table or calculator to convert the base shutter to the final exposure time after you add the filters. I keep a printed chart in my bag so I can adjust quickly in the field.
If the calculated exposure time exceeds 30 seconds, switch the camera to bulb mode and use a remote trigger. This keeps the shutter open for the full exposure without introducing handshake from pressing the button.
- Compose and focus before you attach any dark glass.
- Take a no-glass test shot to note base exposure.
- Double-check the compensation factor for the type of filters you use.
“Measure first, then trust the table — it saves shots and time.”
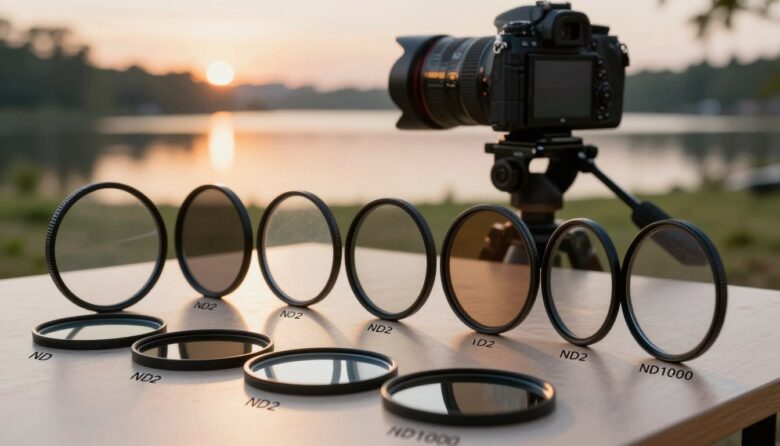
Choosing the Right Strength for Your Scene
Picking the right strength comes down to matching the light with the creative effect you have in mind.
A 10-stop piece is ideal when I want dramatic long exposure results. In practice that means exposures from about 30 seconds up to four minutes in bright conditions. It gives smooth water and streaked clouds with predictable shutter times.
For midday shooting I often use a small, 2-stop piece. It trims the amount of light without forcing long exposures. That keeps motion subtle while letting me keep a wider aperture on the lens.
I check an optical density table to convert base shutter speed to the final exposure. When unsure, I start with a mid-range strength and adjust. For run-and-gun video work, variable filters can help on the fly. For landscape shots where I need graduated control, I reach for graduated filters.
| Scene | Typical Strength | Resulting Shutter |
|---|---|---|
| Calm river, soft water | 10-stop | 30 s – 4 min |
| Bright midday, shallow DOF | 2-stop | 1/30 s – 1/2 s |
| Mixed sky, balanced exposure | 4–6 stops | 1–30 s |
Managing Exposure and Image Quality
Small habits on the tripod and at the front of the lens make a big difference to image quality. I start every session by checking glass and mounting carefully so the final shot is clean and true to the scene.
Use high-quality optical glass when you can. Cheap alternatives often introduce color casts and softness that are hard to correct later. I prefer branded glass from HiTech, Lee, or NiSi for consistent results.
Avoiding Color Casts and Sharpness Loss
Clean your gear before you attach anything onto front lens threads. A speck of dust or an oil mark can ruin a long exposure and show as artifacts in the image.
Watch your shutter speed and the amount light you let in. I measure base exposure, then calculate the final exposure time so the camera holds the shutter for the exact duration I need.
- Choose optical glass over cheaper resin to keep color accurate and sharpness high.
- Always wipe glass clean and inspect for dust or oil before shooting.
- Seal edges on a holder to prevent light leaks that shift color or reduce contrast.
- Manage exposure carefully — it keeps skin tones, sky, and foreground natural and vivid.
“Measure first, then trust the table — it saves shots and time.”
Creative Techniques for Landscape and Video
When I want atmosphere, I slow the shutter and let clouds and water become the subject. This approach adds mood and motion to a still scene without changing aperture or ISO.

Graduated filters are essential when the sky is much brighter than the foreground. I use them to hold detail in the sky while keeping the land rich and textured.
For video shooters, variable filters are a game-changer. They let you adjust light levels on the fly as you move between shaded and bright areas. That keeps shutter speed and exposure consistent for smooth footage.
I love a 10-stop piece to capture long exposure cloud motion. Paired with a steady tripod, it turns a quick scene into a cinematic frame.
- Carry multiple strengths so you can adapt to changing light in the field.
- Use a tripod — even slight movement ruins long exposure effects.
- Try different types of filters to find the look that fits your photography style.
“Experimenting with strengths and types expands your creative toolkit.”
Conclusion
When you master neutral density tools, your landscape work changes for the better. I find the biggest gains come from practicing consistent setups and simple calculations in the field.
I focus on the relationship between optical density and shutter speed so I can predict exposure times. That habit keeps my final image accurate and expressive.
Always choose high-quality glass. Good glass keeps color true and prevents softness or unwanted artifacts, whether you use a single piece or multiple filters.
Get out and experiment with different strengths and types of filters. Practice is how you build confidence and make these tools part of your creative routine.
FAQ
What does a neutral density product do for my exposure?
It reduces the amount of light entering the lens so I can use slower shutter speeds or wider apertures without blowing out highlights. That lets me create long exposures for silky water or keep a shallow depth of field in bright daylight while preserving correct exposure.
How do I pick the right strength for a bright sky versus a cloudy scene?
I choose stronger reductions for bright skies and milder ones for overcast days. For example, a heavy option helps stretch exposure time massively for daytime long shots, while a light reduction keeps motion blur subtle on cloudy afternoons.
What gear should I bring for safe long exposure shooting?
I always take a sturdy tripod, a remote shutter release or camera timer, and lens cloths. I use a front-mounted glass product that matches my lens thread or a compatible holder system for larger lenses and wide-angle work.
How do I set up my tripod and camera for the best results?
I level the tripod, lock the legs and mount the camera solidly. I use manual focus, compose at base ISO, and engage mirror lockup or electronic shutter when possible. That minimizes vibration during long exposures.
How do I calculate the new shutter speed when using a light reducer?
I first determine the correct shutter speed without any reduction. Then I multiply that by the factor of the chosen strength to get the longer exposure time. Many apps and built-in camera calculators also convert the factor directly for me.
What are the main types and when do I use each?
Screw-in circular pieces work great for single-lens setups and are quick to attach. Square or rectangular systems suit wide-angle and graduated uses since I can slide cards for balanced skies. Variable options let me dial the reduction continuously, which is handy for video and changing light.
Do any of these options affect image quality or color?
Some lower-cost glass can introduce color casts or reduce sharpness at extreme strengths. I avoid that by choosing high-quality glass or multi-coated models from reputable brands, and I check results at different apertures to find any softness or tint.
When should I use a graduated product versus a full coverage one?
I reach for graduated pieces when the sky is much brighter than the foreground—typical in landscape shots with dramatic skies. Full coverage ones work best when I need overall light reduction for motion blur or shallower depth of field across the whole frame.
Are variable reductions safe to use with wide-angle lenses?
I’m careful with variable models on wide lenses because they can produce cross-polarization banding at strong settings. For very wide focal lengths or when I need pure uniformity, I prefer fixed-strength glass or a square system.
How do I avoid color casts and maintain sharpness?
I shoot RAW so I can correct slight color shifts in post. I also stop down a bit from the lens’s max sharp aperture, use high-quality multi-coated glass, and test different strengths to learn where my setup remains sharp and neutral.
Can I use these pieces for video as well as stills?
Yes. For video I often use a variable option to maintain consistent exposure while adjusting shutter or aperture smoothly. For cinematic motion blur, fixed strong reductions work well too, but I watch for flicker and banding at certain settings.
How do I handle very long exposures in bright daylight without overexposure?
I combine a heavy solid piece with a low ISO and a closed aperture, and I bracket exposures while checking the histogram. I also use a tripod and remote release to eliminate movement during the extended exposure times.
What maintenance steps keep my glass performing well?
I store glass in a padded case, clean surfaces with a microfiber cloth and blower, and avoid touching coated surfaces. I also inspect mounts and holders for wear so everything seals and aligns correctly on the front of the lens.
Are there brand recommendations for reliable results?
I trust established makers like B+W, Hoya, Lee, and Tiffen for consistent optical quality and coatings. Those brands tend to deliver neutral color and good sharpness across strengths, which saves time in postproduction.

Oliver Grant is an optics specialist and photography enthusiast focused on lens filters, light control, and visual precision. He explores how different filters and optical technologies shape color, contrast, and exposure, delivering clear and practical insights to help photographers achieve cleaner, more refined images.