
I want to share a simple way I built a versatile ND kit using step up rings for filters. I found one larger, high-quality filter and adapted it across my lenses. This saved money and reduced clutter in my bag.
By adding a single step-up ring to a lens, I could mount that larger filter without buying duplicates. I used a 49mm filter on a 43mm lens and later fit a 95mm filter to an 86mm lens with the correct adapter.
The setup choice that simplified my entire kit
For a long time, I kept buying different filter sizes for each lens, thinking it was the “correct” way to build a kit. But after a few trips carrying too much gear, I realized how inefficient that was. Switching to a larger filter with step-up rings completely changed my workflow, and I quickly noticed that less gear often means fewer mistakes and faster decisions.
From my experience, the biggest benefit wasn’t just saving money—it was the simplicity. Instead of thinking about which filter to use for each lens, I could focus on the shot itself. That small change made my setup feel more reliable and less stressful during shoots.
I learned that simplifying your gear doesn’t limit you—it actually gives you more freedom to focus on the image.
If I could give one practical tip, it would be this: choose a filter size that fits your largest lens and adapt everything else to it. It’s a simple decision, but it can save you both money and time in the long run.
In the end, building a flexible system isn’t about having more equipment—it’s about making smarter choices that support your workflow and keep things consistent.
I built a compact, professional set that works across every lens I own. That approach kept my gear light and my budget intact. A single lens filter now serves many bodies and glass.
Key Takeaways
- Buying one quality filter and adapting it saves money and space.
- Adapters let a 49mm piece work on a 43mm lens and a 95mm fit 86mm glass.
- This method keeps your kit flexible without extra bulky purchases.
- I recommend choosing a larger size that suits most of your lenses.
- One well-chosen lens filter can replace several lesser ones.
Why I Switched to Using Step-Up Rings for Filters
I switched to adapter rings when I realized one filter could serve every lens I own. Carrying a small step ring per lens made my bag lighter and my routine faster.
After decades in the hobby, professionals at Samy’s Camera often recommend this method to photographers who want to streamline gear. I liked that a single ring lets me mount a larger filter without buying duplicates.
“This approach reduces weight and clutter while keeping glass protected.”
- I save space by packing one ring instead of many full filters.
- My lens stays protected and I always have the right density ready.
- Standardizing lenses to one filter size speeds my workflow on location.
| Benefit | What I Noticed | Result |
|---|---|---|
| Weight | Smaller carry weight per shoot | Easier travel and long days |
| Cost | Buy one quality filter, add rings | Lower total kit cost |
| Workflow | Quick swaps with one ring per lens | Faster setup on location |
Understanding the Financial Benefits of Filter Adaptation
Saving money on a neutral density kit became obvious once I mapped my lens sizes and adapters. That simple audit showed how one quality lens filter can cover many lenses when I use a small adapter.
Cost Savings on ND Kits
I avoid buying duplicate ND kits by using a single 77mm piece on smaller glass. With one good set, I no longer purchase separate kits for each camera body and lens size.
Buying one high-quality set and adding a ring where needed saved me hundreds of dollars. For budget-conscious photographers, that is a clear win.
Reducing Gear Bulk
Carrying one filter and a couple of small adapters keeps my bag light. Less bulk matters on long shoots and travel days.
- Use a 77mm filter on a 67mm lens with a single adapter — a big financial win.
- One professional set replaces many individual pieces across lenses.
- My workflow is faster and my camera load feels lighter.
How Step-Up Rings for Filters Work in Practice
I begin each shoot by confirming the thread on the lens, then I gently fit the adapter. I find that a calm, even rotation gives the best result.
I tighten the step ring until I feel resistance, then stop. A snug fit protects the camera’s delicate threads and avoids damage.
What I do next:
- I check the lens diameter and pick the correct step-up ring to bridge to my chosen filter.
- I rotate the ring slowly and feel for resistance to ensure a safe thread connection.
- I mount a high-quality lens filter on the adapter; it holds steady during long exposures.
Using these step rings lets me fit larger glass on smaller lenses without extra bulk. My workflow is faster and more reliable when I can swap a single filter across lenses.
Comparing Brass Versus Aluminum Construction
Choosing the right material changed how I handle adapters on long shoots. I noticed weight, feel, and long-term performance mattered more than I expected.
Benefits of Brass
Brass offers a solid, heavy feel that many pros prefer. I find brass gives smoother threading in cold weather and a reassuring grip when I work outdoors.
The electroplated matte black finish on brass frames helps block unwanted reflections. That matters when I shoot high-contrast scenes or use long exposures.
“Brass rings often feel more durable and secure during demanding shoots.”
Advantages of Aluminum
Aluminum products, especially those CNC-machined from 6061, give excellent durability while keeping weight low. I use 6061 pieces when travel and portability are priorities.
Both choices deliver great quality, so my selection usually comes down to whether I want extra heft or a lighter kit. I keep a mix: a heavier ring for studio days and aluminum when I hike.
Identifying Your Lens Thread Diameter
Knowing the exact thread size stops frustration on shoots and keeps my kit compact.
I locate the diameter mark by scanning the front element or the barrel. The marking shows the Ø symbol followed by a number, for example: Ø49mm.
Locating the Diameter Symbol
I always check the front of my lens for the “Ø” symbol. That mark tells me the exact diameter I need to buy a ring.
Once I note the number, I choose the correct step rings so my filter fits every camera without force. A mismatch can stop the ring from seating properly.
- I verify the diameter on the barrel before attaching any lens filter to my setup.
- I keep a list of my lenses and their thread sizes to speed up purchases and packing.
- Matching thread size exactly prevents cross-threading and protects the lens threads.
| What I Check | Where to Find It | Why It Matters |
|---|---|---|
| Diameter mark | Front element or barrel (Ø49mm) | Ensures the ring and filter fit securely |
| Thread fit | Hand-test before tightening | Avoids damage and misalignment |
| Lens list | My gear notebook or phone | Saves time buying the right parts |
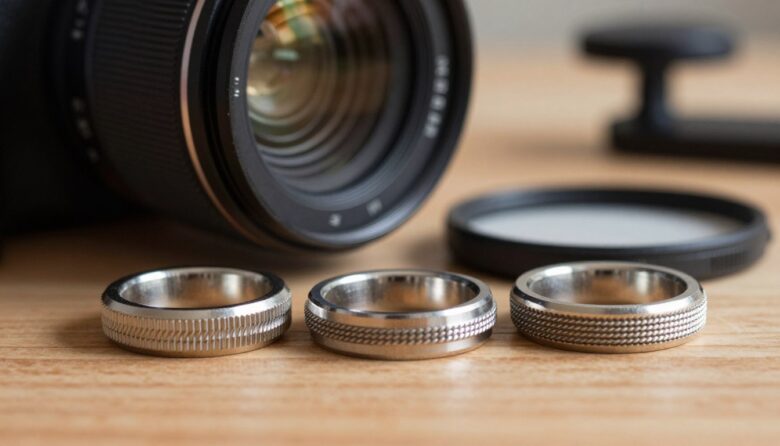
The Importance of Knurled Edges for Grip
A deep knurled edge makes a real difference when I work in cold weather. I prefer brass pieces with pronounced texture because they give a confident hold even with gloves on.

I choose a step ring that lets me secure the thread without tools. That tactile surface helps me apply enough torque to seat the thread properly and avoid cross-threading.
A well-made ring should be easy to operate on the front of the camera when time is short. Cheap models without grip often bind or slip, and that slows a shoot and risks damage.
- I prioritize pieces with deep knurled edges to remove them even with cold hands.
- The knurling gives me enough purchase to tighten the thread quickly and safely.
- My experience shows that a good grip matters as much as the metal used.
Avoiding Common Pitfalls Like Vignetting
Vignetting can quietly ruin an outdoor edit, so I test each adapter combo before a job. I keep my checks quick and practical to avoid surprises on location.
Managing Wide Angle Lenses
I avoid stacking multiple adapters on wide glass because the extra profile often causes dark corners. On a 16–35mm lens, even one bulky piece can block the edge of the frame.
When I work wide, I choose the thinnest step ring available. A low-profile ring clears the light path and reduces the chance of vignetting.
- Keep hardware minimal: I do not stack more than one ring on a wide lens.
- Secure the lens filter: I tighten by hand and test for light leaks before shooting.
- Match the thread: Using the correct ring for my camera setup keeps image quality intact.
- Pre-shoot test: I frame to the edges to confirm no part of the ring appears in the shot.
High-quality pieces helped me cut light leaks and maintain consistent results on long exposures.
Why I Prefer Larger Filters for My Kit
I standardize my kit around a larger diameter so my most expensive glass stays protected and I carry less weight. Buying one premium 95mm filter and adapting it saves cash and time.
I use a single step-up rings set when I need to fit that 95mm piece to smaller lens threads. This approach makes swaps quick on location and keeps my workflow smooth.
Before every shoot I check the lens thread and confirm the match. That simple check prevents cross-threading and ensures the adapter holds solid during long exposures.
Benefits I see include reduced cost, fewer items in my bag, and a predictable system that works with multiple lenses. A single high-quality filter set covers most of my kit and helps me focus on shooting.
Ensuring a Secure Fit for Your Glass
I treat every mount like a safety check: a secure adapter keeps heavy glass from shifting. I thread the step ring onto the front of my lens with a firm, even rotation so the connection sits true.

I stop when the ring feels snug and never force the final turns. A snug fit protects the delicate thread and keeps my lens filter steady during long exposures.
What I do each time:
- I confirm the thread is clean, then screw the step-up ring on by hand.
- I use the knurled grip to tighten—enough to stay put, not so much it jams.
- I recheck the connection after mounting heavy filters or moving between lenses.
“A secure connection prevents accidental drops and keeps my camera ready all day.”
Protecting Your Gear When Not in Use
When I store gear after a shoot, I always protect the mounted glass before I pack it away. I attach a protective cap to the lens filter and then place the camera in its designated bag.
My routine is simple. I clean the thread and then fit the cap so dust and scratches cannot reach the glass. This habit keeps my lens in working order and extends the life of each piece in my set.
I keep a dedicated cart or bag for all small parts so the ring and any adapters never get misplaced. When I order a new product, I try to reach the $100 threshold to qualify for free standard shipping within the continental US.
“Treat each lens filter as a long-term investment; store it with care.”
- I always attach a protective cap to a mounted lens filter when not shooting.
- High-quality caps fit securely even with an adapter attached and protect the thread and glass.
- Keeping parts in a dedicated cart reduces loss and speeds setup on location.
| Action | Why I Do It | Result |
|---|---|---|
| Attach protective cap | Blocks dust, prevents scratches, cushions impact | Cleaner glass and fewer repairs |
| Store in dedicated bag or cart | Keeps small parts organized and secure | No lost rings or adapters; faster setup |
| Hit $100 on orders | Qualifies for free standard shipping in continental US | Saves on shipping costs for new product purchases |
Streamlining Your Workflow on Location
When the light changes quickly, I need a system that lets me swap gear without hunting. I keep one trusted step-up ring in my bag so I can adapt a single filter to smaller lenses fast.
I rely on express shipping when a new product must arrive before a shoot; express takes 2–4 days in the US. Standard shipping is fine for restocking and arrives in 3–7 days.
On the shoot, my cart is organized by thread size and use. That keeps me from digging for the right piece and saves minutes between setups.
“A tidy kit speeds the day and keeps me focused on the frame.”
- Adapting a single filter across lenses reduces weight and confusion.
- Quick swaps mean I spend more time composing and less time fumbling.
- Keeping a clean cart and labeled parts prevents costly delays with the camera.
| Need | Action | Benefit |
|---|---|---|
| Urgent shoot | Use express shipping (2–4 days) | Arrives fast, ready to go |
| On-location swaps | Use one adapter and a single filter | Faster changes, fewer items |
| Organization | Keep cart sorted by size | Less searching, more shooting |
Evaluating Quality and Durability Standards
My quality checks begin with the metal choice and end with a test fit on my lenses.
I look first at construction. I prefer durable brass or CNC aluminum because they last and resist wear.
Next, I inspect the thread. A precision-machined thread reduces cross-threading and protects the camera during frequent changes.
I also check the finish. A matte surface cuts stray light and helps a lens filter perform consistently in bright scenes.
- Material: brass or aluminum for long life and reliable durability.
- Fit: exact diameter and snug seating to avoid wobble on the lens.
- Finish: matte to prevent reflections and stray light issues.
| Feature | What I Test | Why It Matters |
|---|---|---|
| Material | Brass vs aluminum | Durability and weight choice for field work |
| Thread | Precision machining | Prevents cross-threading and protects camera mounts |
| Finish | Matte coating | Reduces stray light and improves filter performance |
I trust brands with strong standards. Urth, a Certified B Corp, gives me extra confidence because they commit to measurable, positive impact and durable production.
In short: choose a ring with precise threads, a matte finish, and robust metal. That choice delivers reliable fit and long-term quality on every shoot.
Making the Right Choice for Your Photography Style
Choose components that reflect whether you favor travel, studio, or landscape work. That clarity makes selecting gear quick and practical.
I pick metals to match my days. I use brass when I want a heavier feel and extra grip on the lens. I choose aluminum when I need lighter weight on long hikes.
Every product I buy for my camera must show clear value. Urth’s lifetime warranty gives me peace of mind and proves the brand trusts its quality and durability.
Before I hit purchase I check my cart for sizes. Confirming thread diameters and counts saves returns and avoids rush shipping fees.
I view a good lens filter as an investment. Buying one durable item and adapting it pays off over time. Pick gear that grows with your skill and supports your creative goals.
Conclusion
A small, consistent system changed how I work and improved my shooting day after day.
I built a compact kit that saves money and keeps my camera ready. Choosing one reliable filter and a single high-quality lens piece let me adapt my lens sizes fast.
I compare brass and aluminum by feel and longevity, always favoring quality that holds on long shoots. Using step rings made it simple to use one filter across many lenses without extra weight.
Standardizing my gear reduced clutter and let me focus on composition. Check each lens thread before you mount parts, handle the camera gently, and store caps when you finish.
Invest in a durable set and you’ll gain freedom to create with your camera.
FAQ
How do I use step-up rings to save money on my ND filter kit?
I buy larger-diameter neutral density glass and adapt it to smaller lenses with a step-up ring. That lets me carry one ND instead of many. I pick a common large size, like 77mm, then use rings to fit my 52mm, 58mm, or 67mm lenses. This reduces cost and clutter while keeping image quality high.
Why did I switch to using step-up rings for filters?
I needed less gear and more flexibility. By using adaptors I avoid buying duplicate filters for each lens thread. The adaptors are compact, light, and often made of brass or aluminum with knurled edges so I can change glass quickly on location.
What are the primary financial benefits of adapting filters instead of buying multiple kits?
I save on initial cost since high-quality ND filters can be expensive. One large filter plus a set of adaptors costs far less than several same-brand filters in every diameter. I also save on shipping when ordering a single size and reduce replacement costs over time.
How does adapting filters reduce gear bulk?
I carry one filter and a few thin rings rather than several bulky boxed filters. That lightens my bag and simplifies packing. Fewer items mean I can move faster and focus on shooting instead of swapping gear.
How do step-up rings work in practice?
A ring screws into your lens thread and provides a larger outer thread where the filter mounts. I screw the ring onto the lens, then attach the same filter I use on larger lenses. The process is fast and reversible, and it keeps my filter collection standardized.
What are the benefits of brass construction for adaptors?
I find brass durable and corrosion-resistant. Brass threads often seat smoother and offer a snug, long-term fit. They feel substantial in hand and resist wear better than some cheaper metals, which helps the adaptor maintain proper alignment with the glass.
What advantages does aluminum offer for adaptors?
Aluminum is lightweight and usually less expensive. Good anodized finishes resist scratches and reduce weight in my bag. High-quality aluminum rings can still provide a solid fit and excellent finish while keeping overall kit weight down.
How do I identify my lens thread diameter?
I look for the diameter symbol (a circle with a line, like Ø) on the front of the lens or printed near the filter ring. The number following it, such as 58mm, tells me the thread size. If it’s not obvious, I check the lens manual or the manufacturer’s website.
Where is the diameter symbol typically located?
I usually find it on the front bezel of the lens near the filter threads, sometimes on the side of the lens barrel. If the symbol isn’t visible, the lens cap or user guide often lists the thread size.
Why are knurled edges important on adaptors and filters?
Knurled edges give me grip when tightening or removing rings and filters, especially in cold or wet conditions. They reduce slipping and let me operate gear quickly without tools, which is vital on shoots where speed matters.
How can I avoid vignetting when using adaptors on wide-angle lenses?
I test each lens and filter combination at widest aperture and focal length. If I see dark corners, I either move to a larger filter size, use a thinner ring, or limit the stack of accessories on the front. Low-profile filters and high-quality adaptors also help minimize vignette.
What steps help manage wide-angle lenses to prevent issues?
I use the largest practical filter size, check for vignetting in the field, and avoid stacking too many rings. If needed, I switch to dedicated wide-angle filters or hold the filter slightly off-axis to evaluate any corner shading before committing to a shot.
Why do I prefer larger filters for my kit?
Larger glass gives me flexibility: one high-quality piece fits multiple lenses via adaptors. Larger filters also allow edge-to-edge optical consistency and reduce the chance of vignetting on wider lenses when I use thin rings.
How do I ensure a secure fit between adaptor and glass?
I tighten rings by hand until snug, relying on knurled edges for grip. I avoid over-tightening to prevent thread wear. Periodically I clean threads and check alignment; well-made brass or anodized aluminum rings maintain a consistent fit over time.
How should I protect my filters and adaptors when not in use?
I store them in padded pouches or a small case to prevent scratches and dings. I keep silica gel packs in the case to control moisture and wipe the glass with a microfiber cloth before storage. Proper storage extends life and keeps optical quality high.
How do adaptors streamline my workflow on location?
I switch lenses without hunting for matching filters. With one filter and a few rings, I adapt quickly between bodies and focal lengths. That reduces interruption and helps me concentrate on composition and light rather than gear swaps.
What should I check to evaluate quality and durability standards?
I inspect thread smoothness, finish consistency, and material (brass vs. aluminum). I prefer rings with precise threading, a uniform finish, and knurling for grip. Reading reviews and choosing reputable brands helps ensure long-term durability.
How do I choose the right option for my photography style?
I consider weight, durability, and how often I change filters in the field. For travel I favor lightweight aluminum; for heavy, frequent use I often pick brass. I also match filter glass quality to my shooting needs—better optics matter more for landscapes and long exposures.

Oliver Grant is an optics specialist and photography enthusiast focused on lens filters, light control, and visual precision. He explores how different filters and optical technologies shape color, contrast, and exposure, delivering clear and practical insights to help photographers achieve cleaner, more refined images.