The 180-degree shutter rule is a practical starting point for controlling motion blur in video. It links exposure time to frame rate so moving subjects retain a familiar balance between definition and blur.
Bright conditions can make that exposure time difficult to maintain. An ND filter reduces incoming light so the camera can preserve the selected shutter, aperture, ISO, and frame rate without overexposing the image.
Basic 180-degree setting: use an exposure time close to one divided by twice the frame rate. At 25 fps, use approximately 1/50 second. At 30 fps, use approximately 1/60 second.
Use ND when the image is too bright after frame rate, shutter, aperture, and ISO have been selected. Choose a filter whose stop reduction is close to the measured overexposure.
Treat 180 degrees as a visual baseline, not a mandatory rule. Faster shutters produce less blur and a sharper, more staccato result; longer exposures produce more blur and can create visible smearing.
What the 180-Degree Shutter Rule Means
A frame recorded at 25 fps occupies 1/25 of a second. At a 180-degree shutter angle, the sensor is exposed for half of that frame interval, producing an exposure time of 1/50 second.
The same relationship applies at other frame rates:
On cameras that display shutter speed rather than angle, the familiar shortcut is:
Set the shutter-speed denominator to approximately twice the frame rate. For 24 fps, the exact 180-degree value is 1/48 second, so 1/50 is normally the closest standard setting.
Frame Rate and Shutter Reference
| Recording frame rate | Exact or approximate 180° exposure | Common camera setting | Typical application |
|---|---|---|---|
| 23.976 fps | Approximately 1/47.95 second | 1/48 or 1/50 second | Cinema-style delivery and online video |
| 24 fps | 1/48 second | 1/48 or 1/50 second | Narrative and cinematic production |
| 25 fps | 1/50 second | 1/50 second | 50 Hz television and regional delivery |
| 29.97 fps | Approximately 1/59.94 second | 1/60 second | Broadcast, web, events, and general video |
| 30 fps | 1/60 second | 1/60 second | General online and commercial content |
| 50 fps | 1/100 second | 1/100 second | Real-time smooth motion or 2× slow motion for 25 fps |
| 59.94 fps | Approximately 1/119.88 second | 1/120 or 1/125 second | Sports, movement, and slow-motion options |
| 60 fps | 1/120 second | 1/120 or 1/125 second | Action, events, and 2× slow motion for 30 fps |
| 100 fps | 1/200 second | 1/200 second | 4× slow motion for 25 fps |
| 120 fps | 1/240 second | 1/240 or 1/250 second | 5× slow motion for 24 fps or 4× for 30 fps |
“Shutter speed should be double the frame rate” is imprecise wording. The shutter-speed denominator should be approximately twice the frame-rate number. At 25 fps, the exposure time is 1/50 second—not 50 seconds.
Shutter Angle Versus Shutter Speed
Shutter Angle
Shutter angle expresses exposure as a proportion of each frame interval. If the camera remains at 180 degrees, changing frame rate automatically changes exposure time to preserve the same relative motion-blur relationship.
Shutter Speed
Shutter speed displays the actual exposure time, such as 1/50 or 1/120 second. When frame rate changes, the operator must update the shutter manually to preserve the same angle.
For example, keeping 1/50 second while changing from 25 fps to 50 fps changes the effective angle from 180 degrees to 360 degrees. The footage will contain substantially more motion blur per frame than 50 fps at a 180-degree shutter.
Use shutter-angle mode when the camera provides it and frame rate changes frequently. It reduces the chance of accidentally leaving a slow-motion shot at the shutter speed intended for normal-speed recording.
What Different Shutter Angles Look Like
Maximum Exposure Time
Uses nearly the complete frame interval. It gathers more light and produces heavier motion blur, but fast movement may look smeared or difficult to track.
Soft, Blur-Heavy Motion
Provides more motion blur than 180 degrees. It can suit dreamy movement, low-light work, or selected slow-motion sequences.
Balanced Starting Point
Provides a familiar compromise between frame definition and motion blur for dialogue, narrative coverage, documentary work, and ordinary movement.
Crisper Movement
Halves the exposure time relative to 180 degrees. Motion contains less blur and may appear sharper, more energetic, or more staccato.
Sharp, Staccato Action
Produces short exposures with little motion blur. It can emphasize impacts, debris, fast action, or a deliberately harsh visual style.
Specialized Effect
Movement can become extremely crisp and visibly fragmented. More light or higher ISO will normally be required.
Shutter angle changes motion rendering as well as exposure. It should not be used as an ordinary brightness control when maintaining consistent motion is important.
Why ND Filters Are Useful
After frame rate and shutter have been selected for motion, the remaining exposure controls are aperture, ISO, lighting, and filtration.
In bright daylight, a camera set to 24 fps, 1/48 or 1/50 second, a wide aperture, and a low ISO may be several stops overexposed. Raising shutter speed would darken the image, but it would also remove the intended motion blur.
An ND filter reduces light while allowing the motion-rendering shutter to remain unchanged.
Maintain Shutter Angle
ND allows the operator to stay near 180 degrees instead of using an extremely fast shutter only to control brightness.
Maintain Aperture
A suitable filter can keep a wide aperture available for shallow depth of field in bright conditions.
Maintain ISO
ND can prevent the need to move away from the camera’s preferred ISO merely because the location is bright.
Match Multiple Shots
Controlled filtration helps maintain similar shutter, aperture, ISO, and motion rendering across a sequence.
An ND filter does not increase sensor dynamic range. It can prevent clipping while maintaining selected settings, but it cannot restore highlights or shadows that exceed the camera’s capture capability.
How to Choose the Correct ND Strength
Set the creative variables first, then measure how far the image is from correct exposure.
- Select the frame rate. Choose according to delivery, real-time movement, or the amount of slow motion required.
- Select the shutter angle or exposure time. Begin near 180 degrees unless another motion style is intentional.
- Select the aperture. Choose depth of field and lens performance before using filtration to control brightness.
- Select the appropriate ISO. Account for the camera’s standard, log, HDR, or dual-base-ISO behavior.
- Evaluate the unfiltered exposure. Use the meter, waveform, false color, zebras, histogram, or highlight warnings.
- Measure the excess brightness in stops. If the image is four stops too bright, begin with a four-stop filter.
- Install or engage the ND. Use internal ND when available or attach a clean, compatible external filter.
- Verify the real result. Filter density and camera metering can differ slightly from the nominal value.
Example: Four Stops of ND
Imagine that the desired settings are 25 fps, 1/50 second, f/2.8, and ISO 800. Without filtration, correct brightness would require 1/800 second at the same aperture and ISO.
| Shutter change | Accumulated difference |
|---|---|
| 1/800 to 1/400 second | 1 stop |
| 1/400 to 1/200 second | 2 stops |
| 1/200 to 1/100 second | 3 stops |
| 1/100 to 1/50 second | 4 stops |
| Recommended starting filter | Four-stop ND, commonly ND16 or ND 1.2 |
Example: Six Stops of ND
If the desired setting is approximately 1/50 second but the unfiltered exposure requires 1/3,200 second, the difference is six stops:
1/3,200 → 1/1,600 → 1/800 → 1/400 → 1/200 → 1/100 → 1/50.
A six-stop filter, commonly labeled ND64 or ND 1.8, provides an appropriate starting point.
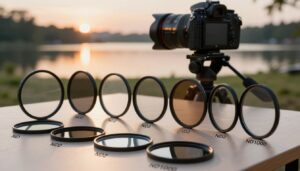
ND Stop Reference for Video
| Light reduction | Common label | Light transmitted | Typical video use |
|---|---|---|---|
| 1 stop | ND2 or ND 0.3 | 50% | Small adjustment in moderate light |
| 2 stops | ND4 or ND 0.6 | 25% | Overcast daylight, golden hour, or higher frame rates |
| 3 stops | ND8 or ND 0.9 | 12.5% | General outdoor filming in moderate daylight |
| 4 stops | ND16 or ND 1.2 | 6.25% | Bright daylight at moderate apertures |
| 5 stops | ND32 or ND 1.5 | 3.125% | Sunny conditions and wide apertures |
| 6 stops | ND64 or ND 1.8 | 1.5625% | Strong sunlight, reflective locations, or high base ISO |
| 7 stops | ND128 or ND 2.1 | Approximately 0.78% | Very bright scenes or strong-log-profile requirements |
| 8 stops | ND256 or ND 2.4 | Approximately 0.39% | Specialized bright conditions rather than ordinary filming |
Use the weakest filter that produces the required exposure. Excessive density may force a higher ISO, make focusing more difficult, or create unnecessary optical and handling problems.
Fixed, Variable, and Internal ND
Fixed ND
- Provides one stated reduction
- Easy to document across a production
- No variable-ND X pattern
- Requires changing filters when light changes
Variable ND
- Allows fast density adjustment
- Useful for events, documentaries, travel, and changing daylight
- May change color or reflections as it rotates
- Can become uneven near extreme settings
Internal ND
- Provides fast exposure control without front-lens handling
- May offer fixed steps or continuously variable density
- Avoids external filter-thread compatibility problems
- Available only on selected cinema, broadcast, and hybrid cameras
Electronic or Motorized ND
- Can adjust exposure during interior-to-exterior movement
- Preserves aperture and shutter during the transition
- Requires a compatible camera or specialized filter system
- Should be tested for color consistency throughout its range
A moderate VND range is generally easier to manage than an extremely broad one. Two narrower ranges, such as 2–5 stops and 6–9 stops, can provide more dependable control than forcing one filter across every condition.
Complete Outdoor Filming Workflow
- Confirm the delivery frame rate. Decide whether the clip will play at normal speed or be conformed for slow motion.
- Set the shutter angle. Begin at 180 degrees or select the closest available exposure time.
- Choose the aperture. Determine the required depth of field and verify that the lens provides acceptable performance at that setting.
- Set the recording profile and ISO. Use an ISO appropriate for the camera’s standard or log mode.
- Lock white balance. Prevent the camera from changing color as composition or filter density changes.
- Frame the scene without excessive filtration when practical. Confirm focus, edges, highlights, and distracting background elements.
- Evaluate exposure. Use waveform, false color, zebras, histogram, or the camera’s exposure meter.
- Add the required ND strength. Avoid changing shutter only to make the meter return to zero.
- Inspect filter behavior. Look for color cast, flare, reflections, corner shading, and variable-ND artifacts.
- Record a movement test. Include subject motion or camera movement representative of the actual shot.
- Review at normal playback speed. Individual paused frames do not reveal the complete motion-rendering result.
- Adjust intentionally. Change shutter angle when the movement style needs to change, not merely because the image is bright.
High Frame Rates and Slow Motion
Higher frame rates shorten the available exposure time. At 120 fps, a 180-degree shutter produces approximately 1/240 second, which gathers two stops less light than 30 fps at 1/60 second when aperture and ISO remain unchanged.
This means high-frame-rate recording may require:
- A wider aperture
- A higher ISO
- More powerful lighting
- A weaker ND filter
- Removing ND completely
When 120 fps footage is conformed to 24 fps, it plays five times slower. Keeping a 180-degree shutter during capture generally provides a useful natural-looking slow-motion baseline.
| Capture setup | Approximate exposure | Motion result |
|---|---|---|
| 120 fps at 360° | 1/120 second | Heavy blur in each slow-motion frame |
| 120 fps at 180° | 1/240 second | Balanced slow-motion starting point |
| 120 fps at 90° | 1/480 second | Crisper particles, sports, water, and impacts |
| 120 fps at 45° | 1/960 second | Very sharp movement with minimal blur |
An exposure time cannot normally exceed the duration of one recorded frame. At 120 fps, the frame interval is 1/120 second, so a setting such as 1/50 second is not a valid ordinary exposure for each 120 fps frame.
Flicker, Mains Frequency, and Shutter Angle
Artificial lights may pulse with electrical frequency, electronic drivers, dimming systems, or display refresh cycles. When camera exposure timing conflicts with that pulse, footage can show bands, brightness variation, or color changes.
A faster shutter is not a universal flicker cure. It may make the bands more visible by sampling a smaller part of each light cycle.
| Lighting environment | Useful exposure-time starting points | Example frame-rate relationship |
|---|---|---|
| 50 Hz electrical region | 1/50 or 1/100 second | 25 fps at 180° gives 1/50 second |
| 50 Hz region at 24 fps | 1/50 second | Approximately 172.8° at 24 fps |
| 60 Hz electrical region | 1/60 or approximately 1/120 second | 30 fps at 180° gives 1/60 second |
| 60 Hz region at 24 fps | 1/60 second | Approximately 144° at 24 fps |
Modern LEDs, dimmed fixtures, projectors, monitors, and high-speed lighting can behave differently from the electrical mains frequency. Use the camera’s fine shutter, clear scan, variable shutter, or flicker-reduction function when available.
- Set the intended frame rate. Do not change delivery format only to hide an untested lighting problem.
- Begin with the regional safe exposure time. Try 1/50 or 1/100 in 50 Hz regions and 1/60 or approximately 1/120 in 60 Hz regions.
- Inspect the complete frame. Look for moving bands, partial discoloration, and brightness pulsing.
- Fine-tune exposure time when necessary. Small adjustments can align the camera more closely with the actual light source.
- Test every fixture and dimming level. A light that is stable at full output may flicker after dimming.
- Recalculate ND after changing shutter. Moving from 1/48 to 1/60 changes exposure and may require a small filtration adjustment.
It is better to use a flicker-safe shutter angle than to preserve 180 degrees exactly. A small motion-blur difference is usually easier to manage than severe banding recorded throughout a scene.
When to Break the 180-Degree Rule
Action and Impact
A 90-degree or 45-degree shutter can make punches, debris, water droplets, sports, and fast movement appear sharper and more aggressive. The result may also look more fragmented during pans or rapid subject movement.
Visual Effects and Tracking
Shorter exposure times can produce cleaner edges for tracking markers, compositing, stabilization analysis, or frame extraction. Motion blur can be added later when the visual-effects workflow specifically requires that approach.
Low-Light Scenes
A larger angle such as 270 or 360 degrees provides more exposure without opening the aperture or increasing ISO. The trade-off is additional motion blur.
Dreamlike or Disorienting Movement
Long exposure times can create trails, smearing, and a softer sense of movement. This may suit music videos, transitions, subjective scenes, or experimental work.
Flicker Control
A non-180-degree angle such as 172.8 or 144 degrees may be selected to reach an exposure time that works better with the lighting frequency.
Fast Camera Movement
Extremely fast pans can strobe even at 180 degrees because objects travel too far between recorded frames. Slower camera movement, a higher frame rate, a different focal length, or more blur may be required.
Breaking the guideline works best when the change is motivated by motion, lighting, visual effects, or storytelling. Changing shutter randomly between adjacent shots can make a sequence feel inconsistent.
Shutter Speed Does Not Control Rolling Shutter
Rolling-shutter skew is influenced primarily by how quickly the sensor reads the frame, not only by the selected exposure time.
A faster shutter can make bent vertical lines or distorted movement look sharper and therefore more obvious, but it does not shorten the sensor’s readout time unless the camera changes readout mode.
To reduce rolling-shutter artifacts:
- Pan more slowly.
- Use a camera mode with faster sensor readout.
- Use a global-shutter camera when the production requires it.
- Avoid rapid handheld vibration.
- Use a wider focal length when appropriate.
- Test high-resolution and cropped modes separately.
Do not expect an ND filter to correct skew, wobble, or jello. ND changes exposure time; it does not change the sensor’s line-by-line readout speed.
Real-World Starting Setups
| Situation | Starting frame rate | Starting shutter | ND approach |
|---|---|---|---|
| Outdoor interview | 24 or 25 fps | 1/48, 1/50, or 180° | Choose enough ND to preserve the intended aperture and ISO |
| Documentary movement | 25 or 30 fps | 1/50 or 1/60 | Moderate variable ND can handle changing daylight efficiently |
| Event moving indoors and outdoors | 25 or 30 fps | 180° when lighting permits | Internal electronic ND or a limited-range VND is practical |
| Commercial slow motion | 100 or 120 fps | 1/200 or 1/240 | Use less filtration than normal-speed recording may require |
| Sharp sports action | 50, 60, 100, or 120 fps | 90° or a faster exposure | Remove ND or use a weaker filter as exposure time shortens |
| Dreamlike music video | 24 or 25 fps | 270° or 360° when supported | Use stronger ND in daylight because the longer exposure gathers more light |
| LED-lit interior | Match delivery requirements | Choose a flicker-safe time | Adjust ND only after the flicker-safe shutter has been established |
How to Test Motion Blur Properly
- Choose a scene with repeatable movement. Use a person walking, a rotating object, moving traffic, flowing water, or a controlled camera pan.
- Lock frame rate, aperture, ISO, focus, and white balance. Only shutter and ND should change between comparisons.
- Record a 180-degree version. Treat it as the baseline.
- Record a faster-shutter version. Try 90 or 45 degrees and compensate exposure by reducing ND or adding light.
- Record a longer-exposure version. Try 270 or 360 degrees and compensate with stronger ND.
- Use the same camera movement. Mark the start and end positions or use a repeatable slider, gimbal, or subject route.
- Review during normal playback. Do not choose solely by the sharpness of paused frames.
- Inspect important details. Watch faces, hands, fabric, foliage, vertical lines, highlights, and foreground objects.
- Choose the version that supports the scene. The technically standard setting is not automatically the most effective one.
Common Mistakes
Pre-Recording Checklist
Frequently Asked Questions
What is the 180-degree shutter rule?
It is a filmmaking guideline that sets exposure time to half of each frame interval. At 25 fps, that equals 1/50 second. At 30 fps, it equals 1/60 second.
What shutter should I use at 24 fps?
The exact 180-degree exposure is 1/48 second. Use 1/48 when available or the nearby 1/50-second setting.
What shutter should I use at 60 fps?
A 180-degree shutter equals 1/120 second. Some cameras provide 1/125 as the closest standard setting.
Do I have to follow 180 degrees?
No. Use it as a baseline. Faster shutters can create crisp, intense action, while longer exposures can create softer or dreamlike movement.
Why do I need ND when I can increase shutter speed?
Increasing shutter speed reduces exposure but also changes motion blur. ND controls brightness while allowing the selected motion-rendering shutter to remain unchanged.
How many stops of ND do I need?
Set frame rate, shutter, aperture, and ISO first. Measure how many stops the image is overexposed and select approximately that amount of ND.
Is ND16 a 16-stop filter?
No. ND16 is normally a filter factor of 16, corresponding to four stops of reduction.
Should I use fixed or variable ND?
Use fixed ND for predictable density and repeatable productions. Use variable ND when lighting changes quickly and rapid adjustment is more important.
Can a variable ND ruin the 180-degree look?
The mounting type does not determine motion blur. However, a VND used near an unsuitable extreme may create uneven density, color shifts, or an X pattern that damages the image.
Should I use 180 degrees for slow motion?
It is a useful starting point. At 120 fps, use approximately 1/240 second. Use a faster exposure when sharper particles or sports action are needed, or a longer exposure when heavier blur is intentional.
Why is high-frame-rate footage underexposed?
Higher frame rates provide shorter exposure windows. At a constant 180-degree angle, 120 fps receives less light per frame than 30 fps. Use more light, a wider aperture, higher ISO, or less ND.
Can a faster shutter prevent LED flicker?
Not reliably. Match exposure timing to the light’s actual pulse frequency or use fine shutter adjustment. A faster exposure can make moving bands more visible.
What is a 172.8-degree shutter used for?
At 24 fps, 172.8 degrees produces 1/50 second, which is a useful starting point under lighting associated with 50 Hz electrical systems.
What is a 144-degree shutter used for?
At 24 fps, 144 degrees produces 1/60 second, which can be useful under selected 60 Hz lighting conditions.
Does ND improve dynamic range?
No. It reduces the total light entering the camera. It can help avoid clipping at selected settings, but it does not increase the sensor’s inherent capture range.
Does a fast shutter remove rolling shutter?
No. Rolling-shutter skew depends mainly on sensor readout time. A fast exposure may make the distorted edges look sharper but does not necessarily shorten the readout.
Why does my footage still look choppy at 180 degrees?
The camera may be panning too quickly, the frame rate may be too low for the movement, nearby objects may cross the frame rapidly, or playback may be dropping or converting frames incorrectly.
Can I use Auto ISO with ND?
It is possible, but monitor whether ISO changes visibly during the shot. Manual ISO provides more predictable exposure and noise continuity when lighting remains stable.
Is a 10-stop ND useful for ordinary video?
It is usually stronger than necessary. Ordinary video commonly uses moderate densities between two and six stops, depending on sunlight, aperture, ISO, and frame rate.
Final Recommendation
Build the exposure around motion first. Select frame rate, begin near a 180-degree shutter, choose aperture and ISO, and then add only enough ND to control the remaining brightness.
Use fixed ND when repeatable density is the priority, variable or electronic ND when lighting changes quickly, and a flicker-safe shutter angle when artificial light makes exact 180-degree operation impractical.
Most importantly, review movement during normal playback. The correct shutter is the one that supports the action, camera movement, lighting, and emotional purpose of the scene—not simply the setting that follows a formula.

The OptiFilter Labs Editorial Team creates practical, carefully researched content about ND filters, camera accessories, exposure control, photography techniques, and video production. Our goal is to help photographers and filmmakers understand their equipment, solve common problems, and make more informed purchasing decisions.