
I often shoot long exposures of flowing water and I rely on a dark piece of glass to craft that dreamy look. I learned from photographers like Chrissy Donadi that a circular polarizer and ND tools can block light to smooth motion and soften an image.
But that benefit can come at a cost. I know that these add-ons act like sunglasses for your lens during long exposure time, and they can introduce dark corners or uneven light if not set up right.
What helped me avoid vignetting issues in real shoots
When I first started using ND filters for long exposures, I ran into dark corners more often than I expected. At first, I thought it was a problem with my camera, but after testing different setups, I realized it was usually caused by how I was mounting and stacking my filters, not the equipment itself.
From my experience, small adjustments make a big difference. I remember a shoot where simply removing one extra filter layer completely fixed the issue. Since then, I’ve been much more careful about keeping my setup minimal and checking everything before taking long exposures.
I learned that most vignetting problems come from setup choices, not from the gear failing.
If I could give one practical tip, it would be this: always take a quick test shot after setting up your filters. It only takes a few seconds and helps you catch dark corners or light leaks before committing to a long exposure.
In the end, avoiding these issues isn’t complicated—it’s about paying attention to your setup and building simple habits that keep your images clean and consistent.
My goal here is simple: help you master your gear so every exposure stays sharp and free of unwanted vignetting. I’ll share practical steps I use in the field to manage glass, maintain correct exposure, and keep the effect subtle and clean.
Key Takeaways
- Use the right combination of gear and placement to avoid dark corners.
- Test setups in the field to balance light and exposure before shooting.
- Keep glass and mounts clean to prevent artifacts in the image.
- Watch stacking and overlap; extra layers can increase the effect.
- Practice common setups so you can focus on composition, not problems.
Understanding the Causes of Vignetting with ND Filters
I learned early that dark corners usually mean something physical is stopping light before it reaches the sensor. The core issue is an angle-of-view mismatch: parts of a filter system can sit in front of the glass and block the outer rays that form the image.
When I use a wide-angle lens, the filter holder ring can restrict the amount of light hitting the sensor. Stacking multiple filters creates a taller barrier and often makes the vignette more obvious.
- Angle of view: physical obstructions cause darker corners.
- Stacking: extra layers cut the field and reduce amount of light.
- Data loss: less light to the sensor means less information for the image.
I treat a variable unit as two polarizers in one ring; that design increases the amount of light loss. If you spot dark corners, the problem is usually the hardware blocking the sensor coverage, not a failing camera part.
Field Techniques to Prevent Dark Corners
In the field I rely on small adjustments to keep every edge of the frame bright. A quick setup check saves time and keeps the image clean.
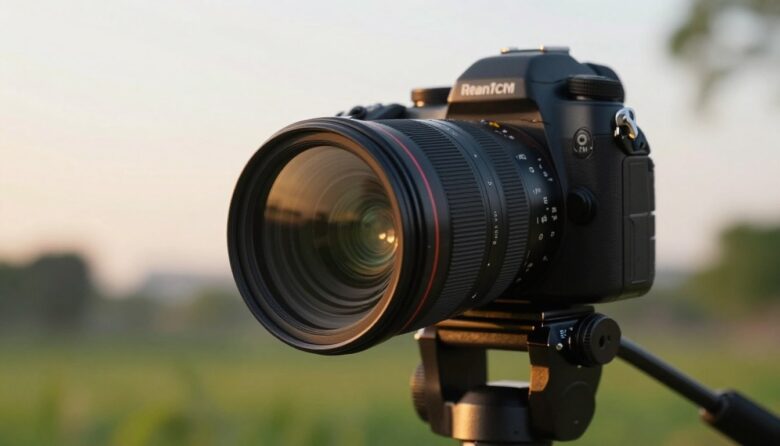
 filter, with a background featuring a scenic landscape. The foreground emphasizes the photographer's focused expression, showcasing their attention to detail in preventing vignetting. The middle layer includes the camera and lens details, highlighting the ND filter and its effect on light. In the background, a vibrant, well-lit scene of trees and a clear sky blends into a softly blurred horizon, illustrating ideal lighting conditions. The atmosphere is professional and serene, capturing a moment of concentration and creativity in photography. Natural light is soft and warm, accentuating the colors and enhancing the clarity of the scene.")
Zoom to Adjust Composition
I often shoot on a Canon 5D and Canon 17-40mm L Series lens. When a vignette appears, I zoom in just a bit to remove the dark corner from the frame.
This is the fastest fix, especially for long exposure water scenes where I need a smooth look but no dark edges.
Manage Aperture and Holder Position
If the composition allows, I stop down to F16. That aperture often reduces the visible vignette and improves sharpness across the image.
I also use a proper filter holder, like the Lee system, and check that the holder does not encroach on the wide angle. Correct placement at setup saves edits later.
- Check on the tripod: confirm the holder clears the lens field.
- Test shots: view a live exposure to spot any dark corners early.
- Fix in post: when needed, use the Lightroom Lens Corrections panel to correct a stubborn vignette.
Selecting the Right Filter Holders and Adapters
A solid adapter ring can make the difference between a clean exposure and a ruined frame. I start by choosing reliable holder brands so the ring mates tightly with my lens and blocks stray light. A good fit prevents leaks and protects the sensor from odd edge darkening.
Avoid unnecessary stacking. Every extra piece of glass in front of the lens raises the risk of internal reflections and a visible vignette on the sensor. I keep an essential setup only and slot the dark piece closest to the lens to cut gaps.
Practical tips I follow
- I favor high-quality holder brands so the adapter ring sits flush and steady on the lens.
- When I skip extra layers, my images show fewer reflections and cleaner light across the frame.
- A wide-angle adapter ring preserves the scene range and reduces the chance of hitting the corner of the frame.
- Choose gear that expands your shooting range while keeping the light path clear and unobstructed.
Managing Light Leaks During Long Exposures
Long exposures can reveal tiny leaks of stray light that ruin an otherwise perfect shot. I treat light control as part of my setup routine so the final image stays clean and consistent.

Covering the Viewfinder Eyepiece
I always carry a roll of gaffer tape to cover my viewfinder eyepiece. This prevents stray light from reaching the sensor during a long exposure and stops odd reflections or streaks in the frame.
Sealing Ports and Doors
Before a long time exposure I check ports, battery doors, and any gaps on the camera body. A small strip of tape over a port keeps ambient light from spoiling the image.
Blocking Gaps Between Lens and Filter
If I spot a circular ring effect on my photos I immediately inspect the area between the lens and the holder. I use a hat or a lens cloth to block any part of the holder that might admit light.
- Practical habit: seal any visible gap around the ring and holder.
- Quick check: run a short test exposure to confirm less light enters the system.
- Prevent artifacts: even a tiny leak can cause reflections and an unwanted effect on the sensor.
Correcting Vignetting and Color Casts in Post-Processing
Post-processing lets me recover lost information from the edges of a shot and correct color shifts from my gear. I start on the color page of my editor and apply a circular power window to target the vignette area. This isolates the dark ring so the rest of the image stays untouched.
I use temporal noise reduction when corner noise appears after brightening underexposed parts of the frame. That smooths grain without softening the whole image.
- DaVinci Resolve: circular power window + feather to match the natural falloff.
- Lightroom: tweak temperature and tint to remove color cast—Lee brands tend to be neutral, but I still check white balance.
- Histogram: always monitor it so corrections don’t clip shadow detail on the sensor or add artifacts.
“If you push a variable filter past its max stop, you risk an X-bar effect that post can’t fully hide.”
I also watch the amount of correction I apply. By using professional software I can often recover the information in the corners of my frame and keep the exposure balanced across the range.
Final Thoughts on Achieving Sharp and Evenly Lit Images
I wrap up, and I want your shoots to be easier and more fun.
I hope these tips help you capture ethereal water scenes and clean skies. Invest in a quality filter holder and adapter ring. That decision pays off over time.
Take the time to set up gear properly before each exposure. Small checks stop big problems later. Mastering these habits lets you focus on composition and creativity instead of gear worries.
Keep practicing and thank you for reading. Good luck on your next long time session—may your image be sharp and evenly lit.
FAQ
How do I prevent dark corners when using a neutral density filter?
I start by using a thin, high-quality screw-in filter designed for my lens diameter and avoid stacking glass whenever possible. I also stop down only as needed and, if my framing allows, zoom out a bit to move the darkest corners off the edge of the frame. Choosing a filter from reputable brands like B+W or Lee helps reduce unwanted edge shadowing.
What causes shadowing at the frame edges when I use strong light reduction?
The main causes are the physical size of the filter relative to the lens, added filter holders, and extreme wide-angle glass that projects beyond the front element. A thick filter ring or multiple layers can block rays at oblique angles, which creates the darkening I see in the corners.
Can changing aperture settings help reduce corner darkening?
Yes. I often stop down carefully; some lenses show less edge falloff at mid apertures. But too-small apertures can exaggerate mechanical vignetting from the filter or holder, so I test my lens-filter combo to find the sweet spot.
Is zooming useful to avoid dark corners when using external holders?
It can be. I zoom in slightly to crop out the most affected edges if composition allows. For wide landscapes, I prefer rotating the holder or using a larger, square filter to cover the image circle instead of relying on zoom.
How do I choose the right filter holder or adapter to minimize edge problems?
I pick holders sized for my widest lens and use low-profile adapter rings. Systems from NiSi and Lee offer wide options and multiband designs that reduce interference. Make sure the holder doesn’t protrude into the image circle and choose matte finishes to avoid reflections.
Should I ever stack reduction elements or extra glass?
I avoid stacking unless absolutely necessary. Each extra layer increases the chance of ring shadowing and reflections. When I must combine effects, I use a single, higher-density solution or switch to a larger filter system to keep glass out of the light path.
How can I stop light from leaking into long exposures?
I block stray light by shading the lens with a matte hood, covering the viewfinder eyepiece on DSLRs, and sealing gaps around the tripod mount and filter holder. For very long exposures I use black tape sparingly on any visible seams and keep the camera aligned to minimize side light.
Do I need to cover the eyepiece during long exposures?
Yes. I cover the eyepiece with the camera’s viewfinder cap or a small piece of foam to prevent stray light entering and creating uneven exposure or flare on the sensor, especially during multi-minute shots.
How do I seal ports and doors to prevent stray light affecting the frame?
I check battery and memory card doors for gaps, remove or cover any dangling straps, and route cables away from direct light. Simple black gaffer tape on vulnerable seams works well, and I keep the camera orientation consistent to avoid unexpected reflections.
What methods stop gaps between the lens and the filter from letting light in?
I use properly threaded adapter rings and snug, low-profile hosts. For square systems I ensure the slot holds the glass flush. If I see light leakage, I apply a thin strip of matte tape around the mount to block the rays without impacting focus or rotation.
Can I fix corner darkening and color shifts in post-processing?
In most cases I correct mild edge darkening and color casts using lens correction profiles in Lightroom or Capture One. For heavier issues I apply graduated masks or radial adjustments and use color calibration tools to rebalance any hue shifts introduced by strong light reduction.
When is post-processing not enough to fix the problem?
When the shadowing is severe or the edges are clipped due to mechanical obstruction, editing can’t restore lost detail. I prevent that by testing equipment combinations before critical shoots and using larger glass or different holders when needed.
Which brands or products help reduce these issues most effectively?
I favor thin, high-precision filters and full-frame-compatible holders from brands like B+W, Hoya, Lee, NiSi, and Formatt-Hitech. These manufacturers offer larger glass, slimmer rings, and matte finishes that cut reflections and minimize edge loss.
How do reflections and internal glass surfaces affect my images?
Internal reflections can introduce ghosting and color shifts. I keep surfaces clean, use single-layer anti-reflective coatings when possible, and avoid shiny adapter rings. Polarizers and multi-coated glass help reduce stray reflections that ruin contrast.
Are there special tips for shooting over water or highly reflective scenes?
I angle the camera to minimize specular glare, use a polarizer in combination sparingly, and test exposure carefully since reflective surfaces amplify any uneven light. I also watch for color casts caused by broad sky reflections and correct them in-camera or in post.

Oliver Grant is an optics specialist and photography enthusiast focused on lens filters, light control, and visual precision. He explores how different filters and optical technologies shape color, contrast, and exposure, delivering clear and practical insights to help photographers achieve cleaner, more refined images.