
I know how frustrating it is when a hazy surface ruins a great shot. Maintaining clear optics is vital for high-quality image output and for protecting expensive gear over time.
In this article I walk you through a step-by-step approach to clean camera filters safely so your glass stays streak-free. I’ll explain simple techniques for lens cleaning and show how small habits keep a camera lens in top shape.
The small cleaning habit that made a big difference for me
I used to clean my filters more often than necessary, thinking it would always improve my images. Over time, I noticed that frequent contact with the glass was actually doing more harm than good. Small marks and micro-scratches started to appear, and that’s when I realized that cleaning less—but cleaning correctly—was the better approach.
From my experience, the biggest improvement came when I followed a simple routine: inspect first, remove dust with a blower, and only touch the surface if it’s really needed. This reduced unnecessary wear and helped me keep my filters in much better condition over time.
I learned that most problems don’t come from dirt itself, but from how we try to remove it.
If I could give one practical tip, it would be this: never rush the cleaning process. Take a few extra seconds to remove loose particles before wiping the glass. This simple habit can prevent scratches and keep your image quality consistent.
In the end, maintaining your filters isn’t about constant cleaning—it’s about being careful, patient, and consistent with small habits that protect your gear in the long run.
Dirty filter elements can cause soft, hazy photos that undermine your work. By using proven methods I show here, you can preserve detail, extend the life of each filter, and capture sharp, consistent images every session.
Key Takeaways
- I emphasize practical steps to protect lens and filter surfaces.
- Proper cleaning improves image quality and gear lifespan.
- Simple routines reduce streaks and preserve clarity.
- I cover safe products and techniques for lens cleaning.
- Following this article helps you capture sharp, professional results.
Why Maintaining Your ND Filters Matters
A well-kept ND filter keeps light behavior predictable and prevents lost opportunities on shoots. A dusty or smudged filter changes how light reaches the sensor and can ruin a frame in seconds. I treat each piece of glass like an investment because a single mistake can affect an entire shoot.
I spend a little time on routine maintenance to protect my camera bodies and the other equipment I use on location. That care lowers the chance of dust spots, moisture damage, or a scratched lens, so my work stays consistent.
Regular cleaning preserves image sharpness and overall quality. I avoid rushed fixes on the road; a quick wipe done right saves me repair bills and downtime. Good habits mean my system performs reliably in rain, wind, or dust.
Over the years I found steady upkeep keeps my gear usable for longer. With proper attention, lenses and filters stay true to their design and I keep creative control over how my camera reads light.
Essential Tools to Clean Camera Filters Safely
I keep a small kit ready so I can tackle dust and smudges without risking the glass. A compact, purpose-built kit makes routine lens upkeep fast and reliable.
The Must-Have Cleaning Kit
I always carry an air blower (a rubber-bulb dust blower) to remove loose particles before touching the surface. A soft brush and a lens pen follow the blower for delicate spots.
Tip: Use an alcohol-free, pH-balanced solution when moisture is needed. That prevents damage to delicate coatings on the element.
Choosing the Right Microfiber Cloth
I recommend a high-quality microfiber cloth because it wipes residue without leaving fibers behind. Fold the cloth and use gentle, circular motions to lift dirt and tiny particles.
“A dedicated kit removes dirt and smudges effectively without scratching the surface.”
- Start with the blower to expel air and dust.
- Use the retractable brush on a lens pen for stubborn debris.
- Finish with a microfiber cloth and a small amount of solution if needed.
Preparing Your Gear for a Streak-Free Clean
Before you lift a cloth, set up a tidy workspace and remove loose grit from the lens with an air blower.
I start by using a rubber-bulb blower to push dust and debris off the surface. This reduces the chance of rubbing grit into the glass when I wipe.
I keep my lens cleaning kit in a Ziploc bag so the tools stay free of dirt until I need them. A sealed bag protects my microfiber cloth and brush between shoots.
When I work, I set up in a clean area with minimal airflow. That helps prevent new particles from settling on the camera lens while I work.
I also use a lens hood during active shooting. The hood gives added protection to the front element and keeps the filter cleaner for longer.
“Small prep steps—blowing first, a dust-free bag, and a hood—cut the risk of streaks and scratches.”
| Prep Step | Why it Matters | What I Use |
|---|---|---|
| Blow off dust | Removes loose particles before contact | Rubber-bulb blower |
| Store supplies | Keeps tools free of dirt | Ziploc bag |
| Protect front element | Reduces contamination during shoots | Lens hood |
| Final wipe | Leaves a streak-free surface | High-quality microfiber cloth |
The Step-by-Step Cleaning Process
Begin with a few careful steps to remove surface particles before you touch the glass. I follow a steady order to avoid scratches and streaks. Work in a calm spot and gather your blower, brush, microfiber cloth, and solution.
Removing Loose Debris
Use a rubber-bulb blower to expel dust and loose debris from the front element and the rear when possible.
Follow with a soft brush or lens pen to lift stubborn particles. On large lenses, like a 400mm f/2.8, take extra time — the pen tip is small and patience pays off.
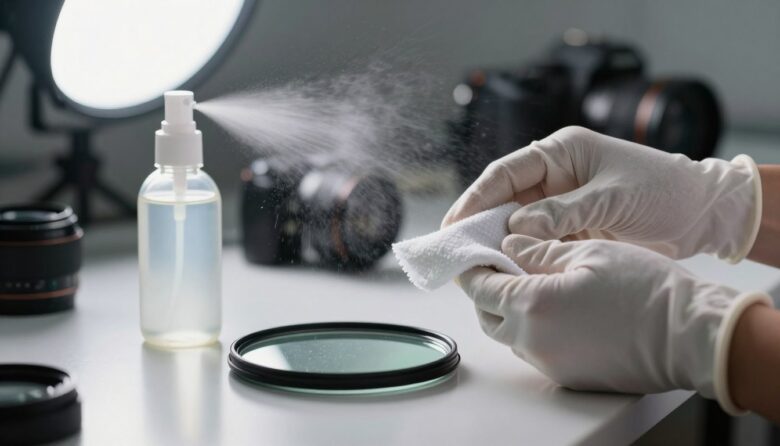
Applying Cleaning Solution
I never spray solution onto the lens. Instead, place one or two drops on a microfiber cloth or an approved wipe.
Zeiss pre-moistened lens wipes are handy for stubborn smudges. A pack of 200 runs around $10 and works well when you need a quick, effective option.
Buffing for a Clear Finish
Wipe in a circular motion, starting at the center and moving outward. This helps avoid streaks and keeps your image output sharp.
Finish by using the blower again to remove any lint or stray particles from the filter surface.
“Always move from center to edge in gentle, circular motion for the best result.”

| Step | Tool | Result |
|---|---|---|
| Remove dust | Rubber-bulb blower | Less grit before contact |
| Brush debris | Soft brush / lens pen | Clears stubborn particles |
| Wet wipe | Microfiber cloth / Zeiss wipe | Removes smudges |
| Final check | Blower | Lint-free surface |
Common Mistakes to Avoid During Maintenance
I see photographers damage optics by using household sprays or by wiping without removing grit first. Bad choices can leave a permanent mark on a lens or filter and ruin a shoot.
Why You Should Never Use Household Cleaners
Never apply alcohol, acetone, dish soap, or window glass cleaner to any coated element. These chemicals strip coatings and can cause clouding that won’t come off.
I also avoid breathing on a camera lens to fog it up. Acidic breath can wear coatings over many times and cause measurable damage.
- Do not wipe an untreated surface first — trapped dirt and particles will scratch the glass.
- Avoid using canned or compressed air — it can spray propellant that harms the sensor or can crack optics.
- Use a dedicated blower and a soft brush instead of a shirt or paper towel to lift dust and dirt.
“Start with the blower and brush; only then use a proper cleaning solution and gentle motion.”
Best Practices for Storing Your Optical Equipment
When I put gear away, I follow a few small steps that reduce dust, corrosion, and contact errors. I store my cleaning kit in a Ziploc bag so my microfiber cloth and other tools stay free of debris.

I always keep each lens capped and place the body and any spare filter in a dry, sealed bag or hard case. For extra protection I tuck a desiccant pack into the bottom of my bag to cut moisture risk.
When I swap a lens, I hold the mount facing downward. This simple habit keeps dust off the sensor and rear element. I also wipe mounts and contacts with a clean cloth to keep communication reliable.
Tip: Store gear in a stable, low-humidity spot and avoid leaving water or liquids near your kit. A neat storage routine is the easiest way to extend gear life and reduce field maintenance.
“Put covers on, use a sealed bag, and keep the mount pointed down when you change lenses.”
How Often You Should Clean Your Filters
I use a simple rule: inspect, blow, then touch—only if the surface needs it.
I only wipe a lens when dirt, smudges, or water spots affect my image. Excessive cleaning raises the risk of a scratch on the element, so I avoid needless contact.
If I shoot in rain or dusty conditions, I expect to attend to the filter several times in a single day. Windy locations make me check gear after each shot because particles can enter the rear or front quickly.
Before I mount any lens, I inspect both front and rear elements. A quick look saves time and protects the sensor from stray debris.
“Inspect first, use a blower next, then remove smudges with a microfiber cloth using a gentle circular motion.”
- When to act: visible smudges, water, or dirt that changes the image.
- During tough conditions: check more often and carry a blower and cloth.
- Routine: avoid overdoing it—fewer, careful touches preserve coatings and protection.
Conclusion
I find that small, regular attention to my optics prevents most problems on location. A quick inspection and the right routine protect a lens and a filter, and keep every image sharp.
Practical prevention, helps avoid costly repairs. I rely on trusted products from the Kase shop and store my equipment with caps and padded cases to reduce dust on the glass and risk to the sensor.
Follow the simple steps in this article and you’ll spend less time on cleaning and more time shooting. Keep habits gentle and consistent, and your camera system will reward you with reliable performance and longer life.
FAQ
How do I remove dust and grit from a glass ND filter without scratching it?
I start with a reliable blower like the Giottos or a Nikon Air Blower to dislodge loose particles. I never wipe until all visible grit is gone; instead I follow with a soft brush such as a CamRade or a Zeiss Lens Brush held at a shallow angle. That two-step approach prevents dragging abrasive debris across the surface and reduces the risk of scratches on the front element.
What’s the best microfiber cloth to use for a streak-free finish?
I use a lint-free microfiber specifically made for optics—brands like Zeiss or MagicFiber work well. I only use a folded corner of the cloth once, and I avoid cheap shop towels. Gently buffing in small circular motions removes smudges without leaving fibers or streaks.
Can I use household window spray or vinegar on an ND glass filter?
No. I never use household cleaners or vinegar because they can damage coatings and leave residues that affect image quality. I stick to a dedicated lens solution or 99% isopropyl alcohol diluted appropriately, applied sparingly to the cloth—not directly to the filter—to protect any coatings and the filter’s threads.
How do I apply cleaning solution without creating streaks or blobs?
I lightly mist the microfiber or place a drop on the cloth’s corner instead of spraying the filter. Starting from the center, I gently move outward in concentric circles to push contaminants away. Using too much solution causes streaks and slow drying, so less is more for a clear finish.
What’s the safest way to handle filters during maintenance?
I handle filters by their metal ring, keeping fingers off the glass. I work over a clean, soft surface or hold the filter vertically to let particles fall away. Using a clean filter pouch or dedicated tray prevents accidental drops and reduces the chance of touching the front element.
How often should I inspect and wipe down ND filters?
I check filters before every shoot and do a light wipe whenever I see smudges or fingerprints. For heavy use or dusty environments, I inspect and perform a full cleaning weekly. Regular quick maintenance saves time and preserves image performance over months.
What tools belong in a compact field cleaning kit?
I keep a small kit with a blower, a soft lens brush, two high-quality microfiber cloths, a bottle of lens cleaning solution or 99% isopropyl alcohol, and a protective pouch. That covers most situations and fits in a camera bag without adding weight.
How should I store ND filters when they’re not in use?
I store filters in individual padded cases or a dedicated filter wallet to avoid contact with other gear. I keep them in a dry, temperature-stable place and add silica gel packs to control humidity. Proper storage prevents scratches, fungus, and dust buildup.
What do I do about stubborn marks like oil or water spots?
I tackle oils with a small amount of optical cleaning solution and a fresh microfiber, using gentle circular motions. For mineral deposits or water spots, I use a slightly stronger alcohol mix applied carefully to remove residue, then immediately dry with a clean corner of the cloth to avoid streaks.
Is it safe to remove a filter from the lens for cleaning, or should I clean it while mounted?
I usually remove the filter to get full access to both the front and rear surfaces and to avoid accidentally touching the lens element. If I clean it mounted, I work carefully to prevent the filter from turning and contacting the lens. Removing it also lets me inspect the threads and housing for debris.

Oliver Grant is an optics specialist and photography enthusiast focused on lens filters, light control, and visual precision. He explores how different filters and optical technologies shape color, contrast, and exposure, delivering clear and practical insights to help photographers achieve cleaner, more refined images.