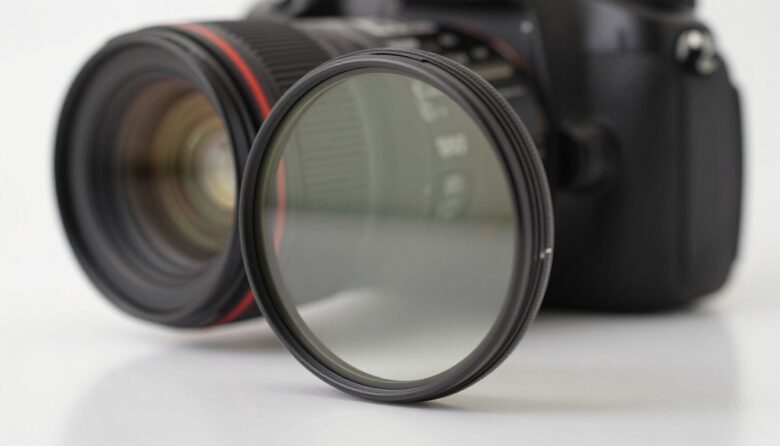
A neutral density filter gives video creators a practical way to control exposure without sacrificing the shutter speed, aperture, or ISO selected for a particular look. The right filter can help preserve natural motion blur, maintain a shallow depth of field, and prevent clipped highlights when filming outdoors.
The best choice depends less on whether a camera is a DSLR or mirrorless model and more on the lens diameter, lighting conditions, focal length, filming style, and amount of light reduction required. This guide explains those differences and highlights useful options for several common video workflows.
Why Video Creators Use ND Filters
Video exposure is different from still photography because shutter speed strongly affects how motion looks. A common starting point is the 180-degree shutter guideline, which uses a shutter speed close to double the frame rate.
| Frame rate | Common shutter starting point | Typical use |
|---|---|---|
| 24 fps | 1/48 or 1/50 second | Cinematic narrative and general filmmaking |
| 25 fps | 1/50 second | PAL-region production and online video |
| 30 fps | 1/60 second | Interviews, tutorials and general online content |
| 50 fps | 1/100 second | Smoother motion or moderate slow motion |
| 60 fps | 1/120 or 1/125 second | Action, sports and slow-motion capture |
These values are creative starting points rather than mandatory rules. A faster shutter can produce sharper, more abrupt movement, while a slower shutter adds more blur. The problem outdoors is that a filmmaker may already have selected the desired shutter speed, aperture, and ISO, yet the image is still too bright.
An ND filter reduces incoming light so those creative settings can remain in place. Instead of raising shutter speed to control brightness, the filter becomes the main exposure adjustment.
Simple example: A creator filming at 25 fps may want to keep the shutter at 1/50 second and the aperture at f/2.8. In bright daylight, those settings can overexpose the image even at the camera’s lowest practical ISO. Adding ND reduces the light while preserving the intended motion blur and depth of field.
Top ND Filter Options by Use Case
The following shortlist includes both variable and fixed-density choices. Prices are intentionally excluded because they can change frequently. Always confirm the required thread size and current product specifications before ordering.
| Filter | Type and range | Best suited to | Main consideration |
|---|---|---|---|
| NiSi True Color VND / SWIFT Kit | Variable 1–5 stops; expandable kit reaches stronger densities | Hybrid creators who prioritize flexible exposure and color control | The complete system costs more than a basic screw-in VND |
| PolarPro PMVND Edition II | Separate 2–5 and 6–9 stop versions | Premium travel, commercial and run-and-gun video setups | The correct range must be selected for the expected light |
| Freewell Hard Stop Variable ND | Separate 2–5 and 6–9 stop versions | Creators seeking a practical VND with defined adjustment limits | Check size availability before standardizing a lens kit |
| HOYA Variable Density II | Approximately 1.5–9 stops | Users who value a wide adjustment range in one filter | Extreme positions should be tested for uneven density or color changes |
| HOYA ND Essentials Filter Kit | Fixed 3, 6 and 10 stop filters | Creators who prefer fixed densities and also shoot photography | Changing density requires physically swapping filters |
NiSi True Color VND and SWIFT Kit
NiSi’s True Color variable ND is designed around a 1–5 stop working range. The SWIFT system can add a separate four-stop element, extending the setup for stronger daylight conditions without requiring an entirely different base filter.
- Good for: documentaries, outdoor interviews, travel films and hybrid photo-video kits.
- Useful feature: the modular system allows stronger filtration to be added when required.
- Watch for: the front-mounted expansion system adds thickness, so wide-angle users should check for corner darkening.
PolarPro PMVND Edition II
PolarPro offers this filter in separate 2–5 and 6–9 stop ranges. The narrower working ranges are easier to manage than a single filter that attempts to cover every possible density.
- Good for: creators who regularly change locations and need quick exposure adjustments.
- Useful feature: the frame includes marked density positions and is designed to limit rotation beyond its intended range.
- Watch for: buying only the 2–5 stop model may not be enough for very bright sun, high base ISO or extremely wide apertures.
Freewell Hard Stop Variable ND
Freewell’s threaded hard-stop VND is also divided into 2–5 and 6–9 stop models. Its defined endpoints help prevent the adjustment ring from being turned far beyond the intended operating range.
- Good for: independent filmmakers, online creators and compact mirrorless setups.
- Useful feature: multiple coatings are intended to improve durability and simplify cleaning.
- Watch for: no VND is immune to every artifact on every lens, so test the darkest position before an important shoot.
HOYA Variable Density II
With an advertised range of approximately 1.5–9 stops, this filter provides substantial flexibility without changing filters. A rotating control knob can also make small adjustments easier while filming.
- Good for: users who want one filter for changing daylight conditions.
- Useful feature: it is produced in several common photographic thread sizes.
- Watch for: broad-range variable filters should be checked carefully at maximum density, especially on wide lenses.
HOYA ND Essentials Filter Kit
This kit combines fixed ND8, ND64 and ND1000 filters, corresponding to approximately 3, 6 and 10 stops. The 3-stop and 6-stop filters are the most immediately useful for video, while the 10-stop filter is better suited to long-exposure photography and selected time-lapse work.
- Good for: controlled productions and creators who want repeatable fixed densities.
- Useful feature: fixed filters avoid the rotating polarizer design used by a VND.
- Watch for: lighting changes require the camera operator to stop and replace the filter.
Fixed ND Is Not Automatically Better
A well-made fixed ND can provide predictable density and avoid the cross-pattern risk associated with variable designs. However, a good VND can be far more practical when clouds, camera position or subject movement cause exposure to change quickly.
- Choose fixed ND for repeatability and controlled lighting.
- Choose variable ND for speed and changing outdoor conditions.
- Choose a modular system when both benefits are needed.
How Many Stops Do You Need for Video?
Filter strength depends on the scene, aperture, shutter speed and ISO. Cameras that require a higher base ISO in a log recording profile may need stronger filtration than cameras operating at a lower ISO.
| ND strength | Light reaching the sensor | Typical video situation |
|---|---|---|
| 1 stop | 1/2 of the original light | Small exposure correction in soft light |
| 2 stops | 1/4 of the original light | Cloudy daylight or a modestly wider aperture |
| 3 stops | 1/8 of the original light | General outdoor filming in moderate conditions |
| 5 stops | 1/32 of the original light | Bright daylight with a wide aperture |
| 6 stops | 1/64 of the original light | Strong sun, reflective locations or higher base ISO |
| 9 stops | 1/512 of the original light | Very bright conditions or specialized exposure needs |
| 10 stops | 1/1024 of the original light | Usually long-exposure photography rather than standard video |
Practical recommendation: A 2–5 stop VND is the most versatile first purchase for many creators. Add a 6–9 stop option when regularly filming in strong sunlight, using log profiles with a high base ISO, or shooting fast lenses close to their widest aperture.
What to Check Before Buying
Choosing a Filter Size for Multiple Lenses
Buying one filter for every lens can become expensive. A common alternative is to purchase a filter that matches the largest lens diameter in the kit and use step-up rings on smaller lenses.
For example, a creator with 58 mm, 67 mm and 77 mm lenses could purchase a 77 mm filter and use 58-to-77 mm and 67-to-77 mm step-up rings. This approach reduces duplication and can also help limit mechanical vignetting compared with adapting a smaller filter to a larger lens.
Step-down rings are generally less suitable because a smaller filter can obstruct the field of view of a larger lens. Lens hoods may also become difficult or impossible to use after a step-up ring is installed.
A Reliable Outdoor Video Exposure Workflow
- Select the frame rate. Choose 24, 25, 30, 50 or 60 fps according to the project and desired motion.
- Set the shutter speed. Use the 180-degree guideline as a starting point, then change it only when a different motion effect is intentional.
- Choose the aperture. Set the depth of field before using the ND filter to solve brightness.
- Choose an appropriate ISO. Use the camera’s normal or base ISO when possible, especially when recording in a log profile.
- Add or adjust ND. Increase density until highlights and midtones fall within the desired exposure range.
- Lock white balance. Avoid automatic white balance changing during a continuous shot.
- Check exposure tools. Use the histogram, zebras, waveform monitor or highlight warnings available on the camera.
- Record a short test clip. Review movement, skin tones, reflections, corner brightness and fine detail before filming the full scene.
Common ND Filter Problems
Dark X-shaped pattern
Variable ND filters use polarizing layers. When rotated too far, especially on broad-range designs, they may create an uneven X-shaped pattern. Stay within the marked working range and reduce density if the frame becomes uneven.
Color shift
Some filters introduce a warm, cool, green or magenta tint. A small consistent shift may be manageable with a custom white balance, but a tint that changes across the frame or throughout the adjustment range is harder to correct.
Uneven skies and reflections
Because a VND relies on polarization, it can affect reflections from water, glass and painted surfaces. Wide-angle shots may also show uneven sky brightness. Rotate the filter while watching the complete frame rather than judging exposure from the center alone.
Softness or reduced contrast
Any extra optical element can influence the image. Fingerprints, condensation, flare and low-quality surfaces can reduce contrast or detail. Keep the filter clean and compare a short clip with and without it when evaluating a new product.
Vignetting
Dark corners are more likely with ultra-wide lenses, thick filter frames or stacked accessories. Use a slim frame, avoid unnecessary stacking and test the exact lens, focal length and filter combination before a paid or unrepeatable shoot.
Do You Need a Tripod?
A tripod is not required simply because an ND filter is attached. Handheld video, gimbal footage and moving-camera work can all use ND filters normally.
A tripod becomes important when the shot itself requires a locked frame, precise composition, time-lapse capture or photographic long exposure. This is different from ordinary video recorded at shutter speeds such as 1/50 or 1/60 second.
Frequently Asked Questions
Is a variable ND better than a fixed ND for video?
A variable ND is usually faster when light changes during filming. A fixed ND is useful when predictable density and repeatable settings matter more than speed. Neither design is automatically best for every workflow.
Is a 2–5 stop VND enough for daylight?
It is enough for many cloudy, moderate and ordinary daylight situations. Strong midday sun, reflective environments, high base ISO or very wide apertures may require a 6–9 stop option.
Can one ND filter work on several lenses?
Yes. Purchase a filter for the largest lens diameter and use step-up rings on smaller lenses. Confirm that the adapted setup does not interfere with the hood, lens cap or other accessories.
Does an ND filter change depth of field?
The filter does not directly change depth of field. It allows the camera operator to use a wider aperture in bright conditions, and that aperture change can produce a shallower depth of field.
Can an ND filter replace correct camera exposure?
No. ND is one exposure-control tool. The camera operator must still choose an appropriate frame rate, shutter speed, aperture, ISO and white balance, then confirm the result using exposure aids.
Should a 10-stop ND be used for ordinary video?
Usually not. Ten stops is extremely strong for standard video and is more commonly useful for long-exposure photography. Some specialized daylight, time-lapse or high-ISO situations may justify it, but it is not the most practical first video filter.
Final Recommendation
For most first-time buyers, a well-made 2–5 stop variable ND in the largest practical lens size is the most useful starting point.
Creators working in intense sunlight or using high base ISO settings should consider adding a separate 6–9 stop model. Fixed ND filters remain a strong alternative for controlled productions where repeatability matters more than rapid adjustment.
Whichever system you choose, test it on your widest lens, inspect color and corner brightness, and record a short motion clip before relying on it for an important production.

The OptiFilter Labs Editorial Team creates practical, carefully researched content about ND filters, camera accessories, exposure control, photography techniques, and video production. Our goal is to help photographers and filmmakers understand their equipment, solve common problems, and make more informed purchasing decisions.