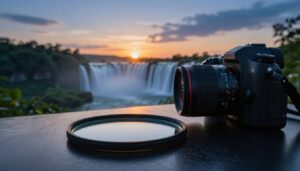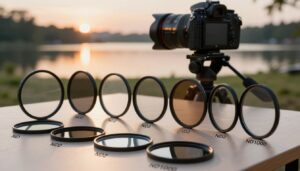
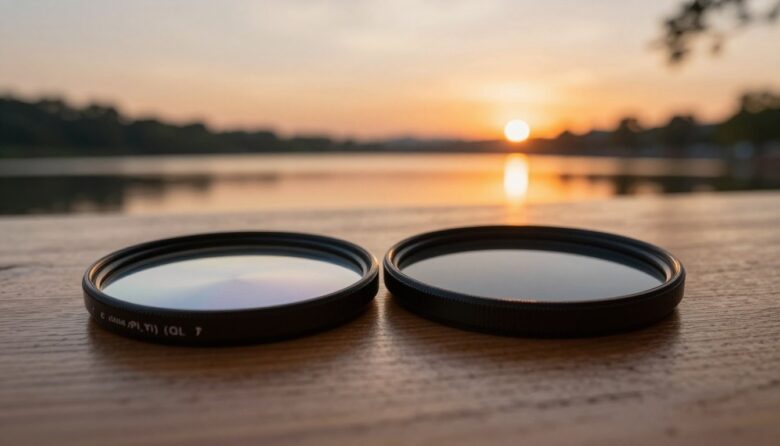
Circular polarizing and neutral density filters can both improve landscape photographs, but they solve different problems. A circular polarizer controls selected reflections and glare. An ND filter reduces the overall amount of light entering the lens so the photographer can use a longer shutter speed or wider aperture.
Confusing the two can lead to disappointing results. An ND filter will not reveal stones beneath reflective water, while a polarizer cannot replace a strong ND when a multi-second daylight exposure is required.
Choose a CPL when the main problem is reflection: glare on water, wet rocks, leaves, glass, painted surfaces, or atmospheric haze.
Choose an ND filter when the main problem is excessive light: the shutter speed is too fast for smooth water, moving clouds, fading people, or another intentional motion effect.
Use both when you need both effects: control reflections first, then add enough ND strength to reach the intended shutter speed.
Controls Reflected Light
- Reduces glare from many non-metallic surfaces
- Can reveal detail beneath water
- Improves color separation in wet foliage
- Can darken selected parts of a blue sky
- Changes strength as its front ring rotates
Controls Overall Exposure
- Reduces light across the complete frame
- Allows longer shutter speeds in daylight
- Can preserve a wide aperture in bright light
- Available in fixed and variable strengths
- Does not specifically remove reflections
CPL Versus ND: Direct Comparison
| Feature | Circular polarizer | Neutral density filter |
|---|---|---|
| Primary purpose | Control polarized reflections and glare | Reduce the overall amount of incoming light |
| Main adjustment | Rotate the front ring while watching the image | Choose a fixed density or rotate a variable ND |
| Effect on water | Can reduce surface reflection and reveal detail beneath it | Allows a slower shutter speed that changes the appearance of movement |
| Effect on foliage | Reduces glare from leaves and wet surfaces | May blur wind-driven foliage when it creates a longer exposure |
| Effect on sky | Can deepen blue areas depending on the angle to the sun | Darkens the sky and land by the same stated amount |
| Exposure reduction | Commonly loses approximately 1–2 stops, depending on design and rotation | Provides the stated density, such as 3, 6, or 10 stops |
| Long-exposure use | May provide enough reduction in dim forests or near sunset | Provides predictable stronger reduction for daylight long exposures |
| Wide-angle concern | Can create uneven sky polarization | Thick frames or holders can create mechanical vignetting |
| Can the effect be recreated later? | Lost reflection detail is often impossible to recover fully in editing | Motion created by a long exposure cannot be recreated identically from one ordinary frame |
How a Circular Polarizer Works
Light reflected from water, glass, paint, leaves, roads, and many other non-metallic surfaces can become polarized. A circular polarizing filter is designed to block part of that reflected light.
The filter has a rotating front section. As it turns, the amount of polarization changes. The result should be evaluated through the viewfinder or rear screen because the strongest setting is not always the most visually effective.
Control Surface Reflection
Rotating the CPL may reveal stones, plants, or color below the water. It can also reduce bright glare that hides texture on the surface.
Reveal Leaf Color and Detail
Reflected highlights can make leaves look pale or washed out. Reducing that glare often creates the appearance of richer color and stronger texture.
Deepen Selected Blue Areas
A polarizer can darken blue sky and increase cloud separation, but the effect depends strongly on the camera’s direction relative to the sun.
Reduce Some Haze and Glare
Controlling scattered polarized light may improve clarity in distant hills or valleys, although it cannot remove fog, pollution, or moisture completely.
A CPL does not simply “add saturation.” It removes selected reflected light that was masking the underlying color and detail. Increasing saturation in editing is not the same as revealing information hidden behind a strong reflection.
A Polarizer Does Reduce Exposure
A circular polarizer absorbs light even when its main purpose is reflection control. The exact loss depends on the polarizing film, coating, product design, scene, and rotation.
Many conventional CPL filters reduce exposure by approximately 1.5–2 stops, while selected high-transmission models may lose closer to one stop.
Modern through-the-lens metering normally accounts for this reduction automatically. It still matters because the camera may compensate with:
- A slower shutter speed
- A wider aperture
- A higher ISO
- A combination of the three
Watch moving foliage and handheld shutter speed. A polarizer can make the exposure slow enough to blur leaves, branches, grass, or the complete handheld photograph.
When a CPL Is Most Effective
Polarization is directional. The effect on a blue sky is generally strongest when the camera points approximately at a right angle to the sunlight.
A simple field check is to point your index finger toward the sun and extend your thumb at a right angle. As you rotate your hand around the index finger, the thumb indicates areas where the sky may show a stronger polarizing effect.
The result is usually weaker when photographing directly toward or directly away from the sun.
Rotate for the image, not for maximum darkness. Stop when reflections, water detail, foliage, and sky look balanced. Maximum polarization can make water unnaturally flat or a sky excessively dark.
Why CPL Filters Can Create Uneven Skies
An ultra-wide lens may capture a large section of sky containing both strongly and weakly polarized areas. The result can be a dark blue band or an uneven gradient that looks unnatural.
This is especially noticeable when:
- The sky is clear and strongly blue
- The lens has an extremely wide field of view
- The polarizer is set near its strongest effect
- The camera points approximately perpendicular to the sun
- Several frames will be joined into a panorama
To reduce the problem:
- Rotate the CPL to a weaker setting.
- Use a longer focal length when the composition allows.
- Reframe so the uneven region is less prominent.
- Remove the CPL for a wide panorama.
- Capture an additional frame without the polarizer as insurance.
Do not attempt to repair severe uneven polarization with global exposure or saturation controls. The dark band is spatially uneven and may require difficult local corrections.
How an ND Filter Works
A solid ND filter is designed to reduce light across the complete frame without targeting reflections. This gives the photographer greater control over shutter speed, aperture, and ISO.
In landscape photography, its most common purpose is extending exposure time to change the appearance of movement.
Smooth or Simplify Motion
A longer shutter can soften a waterfall, connect wave patterns, or turn a moving surface into a calm visual plane.
Create Directional Movement
Exposures lasting several seconds or minutes can turn moving clouds into streaks that guide attention through the frame.
Reduce Moving Distractions
Pedestrians and vehicles may become blurred, translucent, or less visible while stationary structures remain defined.
Preserve a Wider Aperture
ND filtration can keep a wide aperture usable when shallow depth of field is part of an environmental landscape or detail photograph.
Common ND Strengths for Landscapes
| Reduction | Common label | Exposure multiplier | Typical landscape use |
|---|---|---|---|
| 3 stops | ND8 or ND 0.9 | 8× longer | Streams, waterfalls, forests, moderate daylight |
| 4 stops | ND16 or ND 1.2 | 16× longer | Brighter water scenes and intermediate motion effects |
| 6 stops | ND64 or ND 1.8 | 64× longer | Coastlines, waterfalls, moving clouds, daylight long exposures |
| 10 stops | ND1000 or ND 3.0 | About 1,000–1,024× longer | Strong smoothing, cloud trails, minimalist architecture |
| 15 stops | ND32000 or ND 4.5 | 32,768× longer | Specialized multi-minute daylight exposures |
Choose the desired shutter effect before choosing filter strength. A 10-stop filter is not automatically better than a 3-stop or 6-stop filter. It may remove all the texture you intended to preserve.
Fixed ND Versus Variable ND for Landscapes
Predictable and Repeatable
- One stated density per filter
- Easy exposure calculations
- No variable-ND cross pattern
- Strong options such as 6 and 10 stops
- Requires changing filters to change density
Fast but More Complex
- Adjustable density in one filter
- Useful in rapidly changing light
- May alter reflections as it rotates
- Can show uneven density or an X pattern
- Less ideal for very strong calculated exposures
Fixed ND filters are usually easier to manage for planned long-exposure landscape photography. A variable ND is useful for hybrid photo-video work, changing light, or situations where moderate exposure adjustment matters more than exact long-exposure calculations.
A variable ND already uses polarizing elements. Adding a separate CPL can create unpredictable interactions, uneven density, stronger color shifts, or cross-polarization. Test the exact combination before relying on it.
What About Graduated ND Filters?
A graduated neutral density filter is different from a solid ND. It transitions from dark to clear and is used to reduce brightness in one part of the frame, commonly a bright sky above a darker landscape.
The three tools answer three separate questions:
| Problem | Best starting tool | Reason |
|---|---|---|
| Glare hides rocks beneath water | CPL | Controls the surface reflection |
| The shutter speed is too fast for smooth water | Solid ND | Reduces the complete exposure |
| The sky is much brighter than the foreground | Graduated ND, bracketing, or softer light | Controls part of the composition rather than the complete frame |
| The sky is pale because of polarized atmospheric glare | CPL | May deepen selected blue areas when the sun angle is suitable |
| You need reflection control and a longer shutter | CPL plus compatible fixed ND | Each filter performs a separate task |
A stronger solid ND does not balance a bright sky against a dark foreground. It reduces both areas by the same number of stops.
Can You Use a CPL and ND Together?
Yes. Combining a circular polarizer with a fixed ND is useful when the scene contains both distracting reflections and movement that requires a longer exposure.
A common example is a forest waterfall:
- The CPL reduces glare on wet rocks and leaves.
- The CPL may reveal color and detail beneath shallow water.
- The fixed ND provides the additional reduction needed for the intended shutter speed.
- The tripod keeps stationary elements sharp during the longer exposure.
Does Filter Order Matter?
The practical order depends on the equipment. In an integrated holder, the polarizer may sit behind or in front of the square ND filters according to the system design. With threaded filters, the CPL must remain accessible so it can be rotated.
Follow the manufacturer’s recommended arrangement and check:
- Whether both filters can attach securely
- Whether the CPL can still rotate
- Whether the stack creates dark corners
- Whether the original lens hood still fits
- Whether the filters can be separated without overtightening
Use the thinnest dependable setup. An integrated landscape holder designed for a CPL and square ND filters can be cleaner than stacking several ordinary screw-in rings on an ultra-wide lens.
How to Calculate Exposure When Using Both
A CPL has its own light loss, so the total exposure change is greater than the ND rating alone.
For example:
- A fixed ND reduces light by 6 stops.
- The CPL reduces light by approximately 1.5 stops at the selected rotation.
- The approximate combined reduction is 7.5 stops.
Because CPL transmission varies by product and rotation, the most reliable workflow is to meter after setting the polarizer:
- Mount the camera on the tripod. Complete the composition before attaching a very dark ND.
- Attach and rotate the CPL. Set the desired reflection control while observing the complete frame.
- Set aperture and ISO. Choose them for depth of field and image quality.
- Record the shutter speed with the CPL already in place. This reading includes the polarizer’s actual light loss.
- Add the fixed ND. Avoid changing focus, zoom position, or CPL rotation.
- Apply only the ND conversion. Multiply the CPL-metered shutter time by the ND factor.
- Capture and review a test frame. Check the histogram, highlights, corners, sharpness, flare, and color.
Example: If the correct exposure with the CPL attached is 1/30 second, adding a 6-stop ND multiplies that time by 64, producing a starting exposure of about 2 seconds.
Landscape Scenarios and the Best Filter Choice
Forest Waterfall
A CPL can reduce glare on leaves, wet stone, and water. Add a 3-stop or 6-stop ND when the resulting shutter speed is still too fast.
Rocky Stream
Use a CPL when revealing the riverbed and controlling wet-rock reflections matters more than creating an extremely long exposure.
Minimalist Seascape
A 6-stop or 10-stop ND can smooth waves and create a simplified surface. A CPL may remove reflections that are important to the composition, so compare both settings.
Mountain Lake
Use a CPL to choose between surface reflection and visibility beneath the water. Maximum reflection removal is not always desirable because the reflected mountain may be the subject.
Moving Clouds
Use an ND filter to extend shutter speed. A CPL may darken only part of a wide sky, so evaluate the complete frame before combining them.
Wet Autumn Foliage
A CPL can suppress pale reflections from leaves and increase visible color separation. Watch the shutter speed if wind is moving the branches.
Bright Sunrise or Sunset
A CPL may have limited effect when pointing toward the sun. Use exposure bracketing, a graduated ND, or a different composition when the brightness range is the main problem.
Wide Panorama
Avoid strong CPL polarization because the sky effect can change between frames and create visible bands after stitching.
How to Use a CPL Correctly
- Attach the filter squarely. Tighten only until secure so it remains easy to remove.
- Compose the photograph. Include the important reflection, water, foliage, or sky area in the frame.
- Rotate the front ring slowly. Watch the effect through the electronic viewfinder, optical viewfinder, or rear screen.
- Compare more than one setting. Observe the water surface, foreground, vegetation, sky, and distant landscape.
- Stop before the result becomes unnatural. Preserve reflections that add depth, shape, or visual balance.
- Check the corners and sky. Look for mechanical vignetting and uneven polarization.
- Confirm exposure. The filter’s light loss may require a slower shutter speed or higher ISO.
- Capture an alternative frame. When the scene is important, photograph a weaker CPL position or remove the filter for comparison.
How to Use an ND Filter Correctly
- Decide how motion should look. Observe the speed of water, clouds, people, grass, and branches.
- Stabilize the camera. Use a sturdy tripod when the intended shutter speed cannot be held safely.
- Compose and focus without a strong ND. Confirm the edges and critical focus before darkening the view.
- Take an unfiltered reference. Check exposure, highlights, focus, and composition.
- Record the base shutter speed. Keep aperture and ISO unchanged during the conversion.
- Attach the required ND strength. Avoid disturbing focus or zoom.
- Calculate the new exposure. Multiply the base time by 8 for 3 stops, 64 for 6 stops, or approximately 1,024 for 10 stops.
- Use a timer or remote release. Reduce vibration caused by pressing the shutter button.
- Review the real result. The calculation is only a starting point when natural light is changing.
- Try another shutter duration. A shorter or longer exposure may preserve a better balance of texture and movement.
When You Should Avoid a CPL
When You Should Avoid a Strong ND
Vignetting and Filter Stacking
Combining a CPL with an ND increases the physical depth in front of the lens. This can create hard dark corners, particularly on ultra-wide lenses.
To reduce the risk:
- Use slim filter frames designed for wide-angle lenses.
- Remove an unnecessary protective filter before stacking.
- Use one direct step-up ring instead of several adapter rings.
- Use a holder designed to integrate a CPL with square ND filters.
- Test at the lens’s widest focal length.
- Inspect all four corners at full image coverage.
Stopping down does not reliably fix hard mechanical vignetting. If the filter frame physically blocks the field of view, use a thinner or larger-diameter system.
Color, Flare, and Sharpness
Every added optical surface can affect the image. A CPL and ND combination may increase:
- Color cast
- Flare and ghost reflections
- Reduced contrast in backlight
- Visible dust or water droplets
- Mechanical vignetting
- Difficulty cleaning and handling the stack
Before an important shoot, compare:
- No filter
- CPL only
- ND only
- CPL and ND together
Use locked white balance and similar final brightness so color and contrast differences are easier to identify.
Common Mistakes
Landscape Filter Checklist
Frequently Asked Questions
What is the main difference between a CPL and an ND filter?
A CPL controls selected reflections and polarized glare. An ND filter reduces the overall amount of light entering the lens so different shutter speeds or apertures can be used.
Does a polarizer work like a weak ND filter?
It reduces light by approximately one to two stops, so it may lengthen exposure enough in a dim forest or near sunset. Its primary purpose remains reflection control rather than predictable neutral-density reduction.
Can an ND filter remove reflections from water?
A standard fixed ND reduces the brightness of the complete scene but does not selectively remove the surface reflection. Use a CPL when reflection control is the goal.
Can a CPL create smooth water?
It can indirectly allow a slower shutter speed because it reduces some light. Whether that is enough depends on ambient brightness and water speed. Add a fixed ND when a longer exposure is required.
Can I use a CPL and ND together?
Yes. The combination is useful when you need both reflection control and a longer exposure. Test for vignetting, color shift, flare, and secure mounting.
Should the CPL go before or after the ND?
Follow the design of the filter system. The important requirements are that the CPL remains adjustable, the filters mount securely, and the complete arrangement does not create dark corners or unwanted reflections.
Can I combine a CPL with a variable ND?
It is physically possible with selected systems, but multiple polarizing elements can create uneven density, strong color shifts, or cross-polarization. A fixed ND is normally more predictable when a separate CPL is required.
Why does my CPL make one part of the sky darker?
Polarization strength varies with the angle to the sun. An ultra-wide lens can include both strongly and weakly polarized sky, producing an uneven band.
Should I use a CPL for every landscape?
No. Remove it when reflections support the composition, when light is already limited, when shooting a wide panorama, or when the sky becomes uneven.
Can a CPL remove reflections from metal?
Polarizers are most effective on reflections from non-metallic surfaces such as water and glass. Reflections from bare metal are generally much less responsive, although painted or coated surfaces may behave differently.
Which ND strength is best for waterfalls?
A 3-stop filter often preserves texture, while a 6-stop filter creates a longer smoothing effect in daylight. The correct choice depends on ambient light, water speed, and the intended result.
Which filter should I use for a bright sky?
Use a CPL when polarized atmospheric glare is the issue. Use a graduated ND, exposure bracketing, or softer light when the sky is simply much brighter than the foreground.
Why did my leaves become blurry after adding a CPL?
The polarizer reduced the available light, causing a slower shutter speed. Wind-driven leaves then moved during the exposure. Increase ISO, open the aperture, shorten the exposure, or capture a separate faster frame.
Does a CPL increase saturation?
It often makes colors appear richer by removing glare that was hiding underlying color and detail. This is different from simply increasing a saturation control in editing.
Can editing replace a polarizer?
Editing can change contrast, saturation, and selected brightness, but it cannot reliably restore details that were never recorded because a strong reflection obscured them.
Do I need a circular or linear polarizer?
A circular polarizer is the standard choice for modern autofocus and autoexposure cameras. Use a linear polarizer only when the equipment manufacturer confirms compatibility.
Final Recommendation
Choose the filter according to the problem visible in the scene.
Use a circular polarizer when glare hides detail or weakens color on water, wet foliage, stone, glass, or other reflective non-metallic surfaces. Rotate it while observing the complete composition rather than assuming maximum polarization is best.
Use an ND filter when excessive light prevents the shutter speed or aperture required for the intended creative effect. Choose density according to the desired motion, not according to which filter is strongest.
When both reflection control and a long exposure are necessary, meter with the CPL already adjusted, add a compatible fixed ND, and inspect the final stack for uneven sky, vignetting, flare, color shift, and unwanted movement.

The OptiFilter Labs Editorial Team creates practical, carefully researched content about ND filters, camera accessories, exposure control, photography techniques, and video production. Our goal is to help photographers and filmmakers understand their equipment, solve common problems, and make more informed purchasing decisions.