I tested several low-cost filter options so you don’t have to guess which ones deliver pro-grade results. I spent my own money and time comparing build, glass clarity, coatings, and the effect each piece had on final image quality.
Finding the right filter for your camera lens is a key step in controlling exposure in bright conditions. My checks focused on sharpness, color cast, and ease of use during shoots.
What I learned after testing budget filters in real shoots
After trying several low-cost filters in different conditions, I realized that price alone doesn’t define the result. Some cheaper options worked surprisingly well, while others introduced issues like color shifts and loss of sharpness that only became obvious after reviewing the photos carefully. That experience taught me to look beyond marketing and focus on how the filter actually performs on my own setup.
From my experience, the biggest improvement came when I started testing each filter before using it in important situations. Even a quick comparison—shooting the same scene with and without the filter—helped me understand its limitations and avoid surprises later.
I learned that a quick test can reveal more than hours of reading reviews.
If I could give one practical tip, it would be this: always test new gear in a controlled scenario before relying on it in real work. Check sharpness, color, and exposure consistency so you know exactly what to expect.
In the end, budget filters can be useful tools, but they work best when you understand their behavior and adjust your workflow accordingly.
As a working photographer, I wanted real-world answers about performance versus price. I looked for solid design, reliable strength, and coatings that keep water and dust off the glass.
By the end of this guide you’ll know which option gives the best balance of image quality and price for your lenses. Whether you’re new or experienced, the right choice can raise your production value without costing a fortune.
Key Takeaways
- I tested products hands-on to judge build and optical performance.
- Good glass and coatings preserve sharpness and color.
- Proper exposure control matters more than brand name.
- You can find strong design and reliable coatings at low price points.
- This guide highlights affordable options that keep image quality high.
Why I Started Testing Budget ND Filters
I began testing low-cost neutral density options after a long string of vague reviews left me unsure what to buy. I was frustrated by hype and wanted clear, repeatable results for people making real purchases.
As a pro shooter, every piece I put on a lens must protect image fidelity. I needed to know if a filter would degrade sharpness, add color cast, or change how my camera metered light.
I bought or borrowed every sample myself, so my notes are honest and unsponsored. I ran these pieces through shoots in sun, wind, and mixed light to see how they held up in real conditions.
My goal was simple: give fellow photographers a straight answer on price versus optical quality. The comparisons below show which options keep your files clean and which fall short.
- Hands-on testing across common lenses and scenes.
- Focus on sharpness, color, and ease of use.
- Clear guidance so you can buy with confidence.
Understanding the Importance of Neutral Density
Long exposures and wide apertures depend on one simple element: how much light you let through the lens. I learned early that controlling incoming light is the quickest way to change a scene without altering composition.
The Role of Light Reduction
A neutral density filter reduces the amount of light reaching your sensor so you can use slower shutter speeds or larger apertures in bright conditions. This keeps highlights from blowing out and preserves details in both sky and foreground.
Choosing the Right Stop Range
Pick a stop range that matches your creative goal. A small reduction is useful for smoothing water or clouds, while larger stops let you shoot wide open in harsh sun.
- Practical tip: A variable filter that covers a broad stop range reduces the need for a massive kit.
- Learn how density affects color and sharpness; quality varies between options.
- Having a reliable density filter or small kit gives you flexibility on the fly for portraits and landscapes.
My Methodology for Testing Budget ND Filters That Work
My testing started with a strict baseline so each sample faced the same challenge.
Gear and setup: I used a Viltrox 16mm f/1.8 on a Sony ZV-E1 and shot a clean plate without any filter to lock a baseline for image and color.
I then photographed a color checker card through every neutral density filter to measure exposure shifts and tint. I kept camera settings identical for each pass to make comparisons objective.
I ran tests in a studio for precise results and repeated the same sequence outdoors to see real-world differences. For each option I checked sharpness across several stops and noted any color cast or vignetting.
- Time: many hours of controlled and field testing to reduce anomalies.
- Evaluation: focus on optical quality, durability, and value in a small kit.
- Goal: give photographers a clear choice so their lens work improves without wasted money.
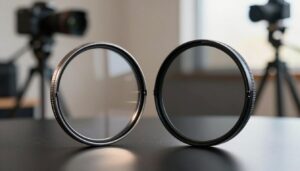
The Reality of Magnetic Filter Systems
Magnetic systems have changed how quickly I can swap protection on a lens during shoots.
The basic stacking mechanism is simple: a magnetic base plate screws onto your lens and you pop the glass on top. I did a vigorous shake test and the pieces held fine, so the connection proved reliable for everyday use.
Magnetic vs Threaded Mechanisms
Magnetic rings offer a much faster way to change gear on your camera than slow-to-thread options. For run-and-gun work, those seconds add up into real savings on set.
- I checked the build of several magnetic ring systems to see if they survive daily professional use.
- Many budget magnetic kits use a simple base plate that lets you stack multiple pieces for better image control.
- The magnetic connection is generally strong, but you must ensure the base ring is tight to avoid accidental drops.
The reality is magnetic systems are becoming common, but choose one with solid build quality. A well-made kit keeps your files clean and speeds up your workflow.
Evaluating the JJC True Color Variable ND
I mounted the JJC True Color Variable ND on several lenses and pushed it through its 1–10 stop range to see how it handled light and color.
What it promises: wide coverage from 1 to 10 stops, no color shift, no X-cross, and no vignetting. At $99.99 CAD, it is an attractive option for many photographers.
How it performed: At low to mid stops the image stayed sharp and color was close to neutral. Pushing toward the maximum density introduced more noticeable color shifts and some loss of contrast.
The build feels acceptable for the price but lacks a premium finish. This is not a magnetic system, so swapping takes the usual threaded approach.
- Good range: 1–10 stops provides flexibility for many scenes.
- Color: small shifts may need correction in post.
- Use case: solid entry-level option for hobbyists; cautious use for high-end work.
| Feature | Result | Notes |
|---|---|---|
| Stops Range | 1–10 stops | Very versatile for varied exposures |
| Color Consistency | Minor shifts | Correction often required in post |
| Image Quality | Good to mid-range | Degrades at max density |
| Build | Acceptable | Not premium; threaded mount |
| Value | Good entry option | Best for hobbyists and learning |
My takeaway: The JJC True Color Variable ND is a flexible choice for those on a tight price point. I recommend testing for color shift on your specific lens before using it on important shoots to ensure image quality meets your needs.
Performance Analysis of K&F Concept Magnetic Solid Filters
I focused my testing on the K&F Concept 5-in-1 kit to see whether magnetic convenience matched optical quality. The set retails for $169.99 CAD and includes a CPL, solid neutral density 8 and 64, a lens cap, and a magnetic adapter ring.
I checked the coatings, water repellency, and how each piece affected image sharpness. The magnetic ring made swaps fast and reliable on location.
The solid pieces handled light control well across common stops, but I noticed slight color shifts with the ND8 and ND64. That required minor correction in post for accurate skin tones and skies.
The CPL and coatings performed strongly; the water-repellent layer shed droplets during a drizzle test. Overall performance compares favorably to similar-priced kits, making this a good option for hobbyists.
- Pros: fast magnetic mount, solid coatings, useful kit range.
- Cons: some color cast on denser pieces; pros may want tighter color consistency.
Final takeaway: the K&F Concept magnetic kit speeds your workflow and gives reliable image quality for most shoots, though careful color checks are advised for critical work.
Testing the K&F Concept Magnetic Variable ND
I put the K&F Concept magnetic variable on my lenses to see if convenience matched optical clarity. This variable filter (ND2–ND32, 1–5 stops) costs about $111.59 CAD and claims 28 multi-layer coatings with no X-cross pattern.
Optical Performance
The glass held up well. Across the 1–5 stops range I saw minimal loss in sharpness and no visible X-pattern during normal use.
The multi-layer coatings cut glare and maintained color balance in bright light. For a neutral density filter in this price range, image quality was impressive.
Ease of Use
Swapping the piece was simple. The magnetic ring snaps on fast and the hold felt secure for run-and-gun shooting.
Build quality feels solid and the magnet strength kept the filter in place even when I moved quickly with the camera. Overall, this variable filter is a strong choice for photographers seeking good performance, easy handling, and reliable coatings in a single, affordable kit.
Reviewing the NEEWER Versatile Magnetic Kit
I put the NEEWER Versatile Magnetic kit through a series of quick field and lab checks to see how much value it actually packs for the price. The set retails for $80.69 CAD and includes an ND2–ND32 variable filter, a stackable CPL, a solid ND32, a Black Diffusion 1/4, a lens cap, and a case.

In practice the variable filter covers a wide range of stops and gives flexible light control. Image quality is average across most settings. I noted small color shifts at higher density and a mild loss of contrast on some lenses.
The build feels decent for the price. The magnetic mount speeds swaps and the case keeps pieces tidy on location. For a beginner this kit is a practical way to learn neutral density techniques without a high price tag.
- Good: versatile range and handy magnetic stacking.
- Limit: color consistency and overall optical quality lag premium sets.
- Recommendation: try it for tests and personal projects; double-check color before paid shoots.
Assessing the NEEWER Solid Magnetic Filter Set
I tested the NEEWER 82mm 5-in-1 Magnetic ND Lens Filter Set ($78.99 CAD) to see how a stackable solid kit performs on location.
The kit uses HD optical glass and 30-layer nano coatings that claim water repellency and scratch resistance. In practice the glass felt clear and the coatings shed droplets well during a brief drizzle test.
I liked the magnetic mount for fast swaps. The build is solid and the pieces snap on and hold securely during quick movements.
Color consistency is where you must be cautious. Stacking multiple solids introduced slight shifts in hue and contrast. That is common for sets in this price range and often fixed in post.
“A practical kit for photographers who need reliable solid pieces with quick handling—great value for casual and student work.”
- Good protection from water and scratches thanks to multi-layer coatings.
- Easy stacking for stepped density control across several stops.
- Minor color shifts when multiple pieces are used together.
| Feature | Result | Notes |
|---|---|---|
| Glass | HD optical | Clear across common focal lengths |
| Coatings | 30-layer nano | Water-repellent, scratch-resistant |
| Handling | Magnetic | Fast swaps; secure hold |
| Image quality | Good | Color shifts when stacking; fixable in post |
Bottom line: The NEEWER kit is a practical, affordable set for photographers who want solid pieces and fast handling. It offers real utility for outdoor shooting, even if ultimate color fidelity needs extra checks for paid work.
Comparing Budget Options Against Premium PolarPro Gear
I wanted to know if high-end magnetic systems justify their steep price for most photographers.
I compared my tested kits with the PolarPro Peter McKinnon variable filter (6–9 stops, ~CA$340) and the Helix Maglock systems (~CA$460 per kit). I checked light reduction, color, and image sharpness on the same lens and scenes.
The PolarPro pieces showed top-tier build and consistent color across stops. The magnetic Maglock system is rock solid and fast to swap on a shoot.
For many shoots, lower-cost options delivered acceptable performance. They sometimes needed minor color fixes in post, but sharpness was close in most real-world tests.
- Premium gain: best coatings, near-zero tint, premium magnetics.
- Practical choice: cheaper kits often give enough control for casual and client work.
| Item | Price (approx) | Performance |
|---|---|---|
| PolarPro Peter McKinnon | CA$340 | Excellent image and color across 6–9 stops |
| PolarPro Helix Maglock | CA$460 per kit | Top build, seamless magnetic swaps, pro-level consistency |
| Typical lower-cost kit | CA$80–$170 | Good for most shooters; minor color correction often required |
My recommendation: weigh your shooting needs. If absolute quality and faster handling matter daily, invest in PolarPro. If you need a sensible kit for varied projects, the cheaper options remain a valid choice.
Identifying Common Issues Like Color Cast and Vignetting
When testing neutral density pieces I looked for predictable faults that harm image quality in the field. Small issues can become big headaches during a shoot, so spotting them early saves time in post.
Identifying Magenta Shifts
I saw a clear magenta shift with the JJC VND on several lenses. Skin tones and skies leaned toward purple at mid to high stops. Always shoot a color chart or a neutral patch to spot a hue change quickly.
Managing X-Pattern Artifacts
Variable filter designs are essentially two crossed polarizers. At high density the result can be an X-pattern across the frame. If you see uneven dark bands when closing down, reduce the density or recompose to avoid uniform skies.
Correcting Sharpness Loss
Some pieces softened fine detail, especially near the edges. I compared sharpness against an unfiltered baseline and flagged any drop. In post, selective sharpening helps, but the best fix is choosing higher optical quality in your kit.
| Issue | How to Spot | Quick Fix |
|---|---|---|
| Magenta shift | Skintones look purple; color card shows tint | Shoot RAW; apply white balance + magenta/green correction |
| X-pattern | Cross-shaped dark bands at high density | Lower density, recompose, or use a solid neutral density |
| Vignetting | Dark corners at wide angles | Use step-up rings or stop down; crop if needed |
| Sharpness loss | Reduced micro-contrast and edge detail | Select higher-quality glass; cautious sharpening in RAW |
- Exposure consistency matters: test each piece on your lens and stops before client shoots.
- Shoot RAW to preserve headroom for color and sharpness fixes in grading.
How to Properly Use Step Up Rings for Your Lenses
I keep one large filter on hand and adapt it to every lens with step-up rings to cut down gear and confusion.
Why use step-up rings: Using a single 82mm filter across many lenses saves space, money, and time on set. I fitted the 82mm pieces I tested to smaller glass with rings and kept image quality steady across focal lengths.
Ring quality matters. Invest in a well-made ring so the filter stays tight on the lens and avoids any light leaks that could ruin exposure.

- I carry a few common sizes so I can adapt the 82mm kit to most lenses in my bag.
- Tighten the ring securely before shooting to prevent play and stray light.
- Choose the correct ring size to reduce the risk of vignetting on wide-angle lenses.
- This method makes it easier to maintain consistent color and sharpness across lenses and stops.
Practical tip: keep a small set of rings in your camera case and test each ring/filter combo on your lenses before client shoots. That extra check prevents surprises and keeps your images reliable.
Why Build Quality Matters for Run and Gun Shooters
I’ve broken more than one cheap mount while rushing between locations, so build became my top criterion.
For run-and-gun work you need a robust filter that survives constant packing and quick swaps. A metal frame and good glass protect your lens and save precious time on set.
I tested each piece by packing and unpacking it multiple times and exposing it to a light drizzle. Pieces with solid design shed water and stayed true under stress.
Note: 6–9 stops is often too much for most video unless you’re filming at high noon. I prefer moderate stops with reliable build when I’m moving between locations.
- Durability: metal frames resist dents and keep threads true.
- Glass: higher-grade panes keep sharpness and color stable.
- Handling: secure mounts reduce dropped pieces during fast swaps.
| Attribute | Why it matters | What I looked for |
|---|---|---|
| Frame material | Resists knocks and warping | Aluminum or brass threading |
| Glass grade | Maintains sharpness | Low-reflection, high-transparency glass |
| Coatings | Repels water and oil | Multi-layer hydrophobic coatings |
My Top Recommendations for Your Camera Bag
After months of field testing, I narrowed my picks to two standouts that cover most shooting needs.
My top choice is the K&F Concept Magnetic Variable ND (ND2–ND32). I found it offers the best balance of performance and price. It gives flexible density control, snaps on fast with a magnetic mount, and kept sharpness strong across stops.
If you want a premium option, the PolarPro Helix Maglock 2–5 stop variable filter is top-tier. Its build quality and color stability are excellent. It costs more, but the strength of the design shows in real shoots.
Why these two? Between them you get a practical kit for most lenses and scenes, plus a high-end route if you need pro-level consistency.
- I recommend the K&F Concept for reliable image and fast handling.
- Consider PolarPro if build quality and near-zero color shift are must-haves.
- Choose a variable filter to cover more density needs with less gear.
| Product | Best for | Key benefit |
|---|---|---|
| K&F Concept Magnetic Variable ND | Everyday shooters | Great balance of price, sharpness, and handling |
| PolarPro Helix Maglock | Pro work, frequent swaps | Top build quality and color consistency |
| Both options | Many photographers | Reliable light control and improved image quality |
Final note: I spent a lot of time testing these products so you can pick the right option for your kit. Try each on your camera and lenses before critical shoots to confirm color and sharpness meet your needs.
Filters You Should Avoid Based on My Experience
During field checks I flagged several products that introduced unacceptable hues or softening.
Quick rule: avoid any filter that shifts color or robs edge detail. These faults are hard to fix and can ruin a shoot.
I tested a NEEWER Versatile Magnetic kit and found it was not a true magnetic variable filter. Image quality suffered and the price did not match results.
In my experience, variable filter designs that produce a strong cast or heavy loss of sharpness are not worth the risk. Photographers should pass on kits or single pieces that show these signs.
- Save for a better option rather than buying a product that damages your files.
- Read real reviews and test on your lens before committing to a kit.
| Issue | How to Spot | Quick Fix |
|---|---|---|
| Color cast | Skin tones or color card show tint | Shoot RAW; replace the filter |
| Sharpness loss | Soft edges, low micro-contrast | Swap to higher-grade glass |
| X-pattern / uneven | Dark bands at high stops | Use a solid density filter or lower stops |
My goal is to steer you away from poor products so your images stay strong and consistent. Make careful choices and test before a paid job.
Conclusion
Finding the right filter comes down to matching optical performance with how you actually shoot.
I tested many pieces on real shoots to compare sharpness, color, and handling. My goal was to help you pick a solid choice for your lens and camera without guesswork.
Prioritize glass quality and a mount that stays secure during fast swaps. Good coatings keep images clean and make post easier when density changes are needed.
Try any option on your rig before a paid job, and share your experience in the comments. Thanks for reading — I hope this guide helps you capture better images with confidence.
FAQ
How do I choose a neutral density filter that preserves image quality?
I look for solid glass with multicoatings, a known brand like K&F Concept, NEEWER, or H&Y, and consistent reviews on color neutrality. I prefer filters that advertise low color cast and test well across multiple lenses and apertures. Also check build: brass or aluminum rings reduce wobble and help maintain sharpness at the edges.
Can a variable density filter cause problems with my photos?
Yes. Variable neutral density devices can introduce X-pattern artifacts and color shifts—especially at stronger settings. I test them across the full stop range and avoid using variable designs past their rated strength. For long exposures or heavy light reduction, I often choose solid neutral density glass to keep the image clean.
Are magnetic filter systems worth using on a tight budget?
They can be. I like magnetic mounts for speed and convenience, especially for run-and-gun shooting. The tradeoffs are sometimes looser tolerance and potential light leaks or misalignment on certain lenses. If you choose magnetic kits, pick ones with strong magnets and good build quality to avoid wobble.
How much color cast should I expect from cheaper density filters?
Some shift toward magenta or green is common in lower-cost options. I measure the cast in RAW frames and correct it in post when needed. Filters with decent coatings and true-color labeling reduce the work, but plan to spend some time on white balance if you want perfect color.
Will a low-cost glass filter reduce sharpness?
It can. Inferior glass or poor coatings may soften microcontrast and edge detail. I compare sharpness using the same lens and aperture with and without the filter; small losses are normal, but unacceptable blur is a sign to upgrade. Good budget glass minimizes the difference.
How do I avoid vignetting when using a filter kit across multiple lenses?
Use the largest filter size your lenses allow and step-up rings to adapt smaller threads. I prefer thin-profile rings for wide-angle lenses and test each combo on the widest focal length. Magnetic adapters help, but watch for added thickness at the front element that can cause corner darkening.
Is it better to buy a solid neutral density or a variable unit for landscape long exposures?
For longer exposures and critical image quality, I choose solid neutral density glass. Solids give predictable light reduction and cleaner edges. Variable filters are handy for quick adjustments and video, but they risk artifacts at higher stops, so I don’t rely on them for long, single-exposure shots.
How many stops of light reduction do most photographers need?
It depends on the scene. I keep a 3–6 stop option for handheld motion blur and a 10-stop for long exposures in daylight. A combination kit or stacking compatible solids covers most needs without pushing a variable filter into its problematic extremes.
Can I stack cheap filters safely to increase density?
You can stack, but watch for added vignetting, reflections, and color shifts. I avoid stacking more than two at once and prioritize thin rings and high-quality coatings when I do. For heavy light reduction, a single high-density solid is usually cleaner than multiple stacked pieces.
How should I clean and care for glass filters to keep performance high?
I use a blower, soft brush, and microfiber cloth with appropriate cleaner. Avoid harsh chemicals. Store filters in padded cases and keep threads free of grit. Proper care preserves coatings, reduces flare, and keeps images sharp over time.
Do step-up rings affect image quality or introduce problems?
Step-up rings themselves don’t change optics, but poor thread alignment or cheap metal can misalign a filter and cause light leaks or vignetting. I buy well-machined rings and test each lens-plus-adapter combination to ensure snug fitting and consistent performance.
How do I correct magenta or green shifts from a filter in post?
I correct color casts using white balance and tint sliders in RAW processing, then fine-tune with local adjustments if needed. Shooting a gray card with the filter on helps create an accurate profile and speeds correction in Lightroom or Capture One.
Are branded premium filters like PolarPro worth the extra cost?
For pros and pixel-peeping enthusiasts, yes—premium glass often delivers cleaner color, better coatings, and superior build that reduce artifacts and improve sharpness. I balance cost against use: if I shoot commercial or high-detail work, I invest; for casual projects, quality budget options can suffice.
What should I avoid when buying inexpensive density glass?
Avoid cheap plastics, weak threads, and uncoated surfaces. I skip filters with poor customer feedback on color cast or heavy vignetting. Look for consistent test shots from other photographers and choose brands with warranties and clear specifications.
How do coatings impact filter performance?
Coatings reduce reflections, flare, and ghosting while preserving contrast. I prioritize multilayer, anti-reflective coatings on both faces and hydrophobic top layers for easy cleaning. Coated glass yields better contrast and less postwork than uncoated pieces.

Oliver Grant is an optics specialist and photography enthusiast focused on lens filters, light control, and visual precision. He explores how different filters and optical technologies shape color, contrast, and exposure, delivering clear and practical insights to help photographers achieve cleaner, more refined images.