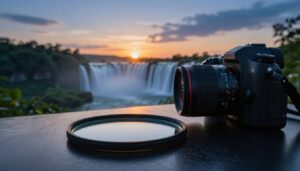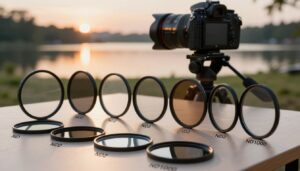

A bright outdoor scene can make it difficult to use the wide aperture needed for a softly blurred background. An ND filter solves this exposure problem by reducing the light entering the lens while allowing the photographer to keep the aperture, ISO, and flash-sync settings required for the intended look.
The filter does not create background blur by itself. Blur comes primarily from aperture, focal length, focusing distance, subject-to-background distance, and framing. The ND filter simply makes those creative settings usable when the available light is too strong.
For stronger background blur: open the aperture, move closer to the subject, increase the distance between the subject and background, and use a longer focal length when the composition allows.
Add an ND filter only when the required exposure exceeds the camera’s useful shutter-speed range, conflicts with flash synchronization, or prevents you from maintaining the video shutter speed you want.
Background Blur and Motion Blur Are Different
A blurry background in a portrait normally refers to shallow depth of field. The subject remains sharp while areas in front of and behind the focus plane appear progressively softer.
Motion blur is caused by movement during the exposure. A photograph can have a beautifully soft background and still contain unwanted subject blur if the shutter speed is too slow.
Soft Background
Controlled mainly by aperture, focal length, subject distance, background distance, and the required framing.
Motion Blur
Controlled mainly by shutter speed, subject movement, camera movement, and stabilization technique.
An ND filter can force a slower shutter speed if it is stronger than necessary. Always confirm that the final shutter speed remains fast enough for the subject and the way the camera is being held.
What Actually Creates a Blurred Background?
Wide Aperture
A wide aperture is represented by a low f-number, such as f/1.4, f/1.8, f/2, or f/2.8. It produces a shallower depth of field than a smaller aperture such as f/8 or f/11 when the other shooting conditions remain comparable.
Extremely wide apertures also make accurate focusing more demanding. For a close portrait, one eye can be sharp while the other falls outside the depth of field. Choose the aperture for the required amount of subject sharpness rather than automatically selecting the lowest number on the lens.
Subject-to-Background Distance
Increasing the distance between the subject and the background is one of the most effective ways to make the background look softer.
A person standing directly against a wall will not have the same separation as a person standing several meters in front of trees, lights, or architecture. This adjustment costs nothing and can improve the result even with a modest lens.
Camera-to-Subject Distance
Moving closer to the subject generally reduces the apparent depth of field. Keep enough distance to preserve comfortable facial perspective and the intended framing.
Focal Length and Framing
Longer focal lengths can produce strong background separation, particularly when used with a wide aperture and sufficient distance behind the subject.
However, blur should not be judged from focal length alone. Moving farther away to maintain the same framing changes perspective, camera-to-subject distance, and the apparent relationship between the subject and background.
Practical composition tip: Before adding equipment, move the subject away from the background and look for distant highlights, foliage, or simple shapes. Better spacing often improves the image more than using the widest possible aperture.
Why Bright Sunlight Creates an Exposure Problem
A wide aperture allows a large amount of light to reach the sensor. In bright sunlight, the camera may require a very fast shutter speed to avoid overexposure.
This is not always a problem. During natural-light photography, the camera may simply use 1/2,000, 1/4,000, or 1/8,000 second if those speeds are available and appropriate.
An ND filter becomes useful when:
- The required shutter speed is faster than the camera can provide.
- Electronic-shutter limitations make the fastest settings unsuitable.
- You want to use normal flash synchronization at a much slower shutter speed.
- You are filming and want to maintain a specific motion-blur relationship.
- You want a consistent exposure approach across multiple cameras.
- The chosen recording profile has a relatively high base ISO.
Do not add ND automatically. For a natural-light portrait, a fast shutter speed may already allow the desired aperture without introducing another optical element.
How to Choose the Correct ND Strength
The required filter strength is the difference between the shutter speed needed without the filter and the shutter speed you want to use.
Each stop of ND halves the light:
| ND reduction | Light transmitted | Common portrait use |
|---|---|---|
| 1 stop | 1/2 | Small exposure correction in moderate light |
| 2 stops | 1/4 | Cloudy daylight or a moderately wide aperture |
| 3 stops | 1/8 | General outdoor portraits and video in moderate daylight |
| 4 stops | 1/16 | Bright conditions with wide apertures or flash synchronization |
| 5 stops | 1/32 | Strong sun when reducing a very fast shutter toward normal flash sync |
| 6 stops | 1/64 | Intense sunlight, higher base ISO, or unusually bright reflective locations |
Example: Reducing Shutter Speed for Flash
Imagine that the correct ambient exposure at ISO 100 and f/1.8 is 1/8,000 second. Your camera and flash can synchronize normally at 1/250 second.
| Change | Stop difference |
|---|---|
| 1/8,000 to 1/4,000 second | 1 stop |
| 1/4,000 to 1/2,000 second | 1 additional stop |
| 1/2,000 to 1/1,000 second | 1 additional stop |
| 1/1,000 to 1/500 second | 1 additional stop |
| 1/500 to 1/250 second | 1 additional stop |
| Total reduction required | Approximately 5 stops |
A 5-stop ND would provide a useful starting point in this example. The real result must still be confirmed with the histogram and highlight warnings because sunlight, filter density, metering, and reflected light vary.
A 6-stop or 10-stop filter is not automatically required for portraits at f/1.8. The correct strength depends on the measured exposure, desired shutter speed, ISO, flash method, and actual brightness of the scene.
Three Practical Shooting Workflows
Natural Light
Use a wide aperture, low or appropriate ISO, and a fast shutter speed. Add ND only when the shutter-speed limit or another camera restriction prevents correct exposure.
Normal Flash Sync + ND
Keep the shutter at or below the camera’s normal synchronization speed, use ND to control ambient exposure, and adjust flash power for the subject.
High-Speed Sync
Use a shutter speed above normal sync with a compatible flash. ND may be unnecessary, although HSS generally reduces effective flash range.
Workflow 1: Natural-Light Portraits
- Position the subject first. Move the subject away from the background and look for a simple, distant setting.
- Choose the focal length and framing. Decide how much of the environment should appear before selecting exposure settings.
- Select the aperture. Use a value that produces the desired blur while keeping the necessary parts of the subject sharp.
- Set an appropriate ISO. Use the camera’s normal low or base setting when practical, but do not assume that ISO 100 is ideal for every camera.
- Set the shutter speed for correct exposure. Confirm that it is fast enough to prevent subject and camera movement.
- Add ND only when necessary. Use the weakest filter that solves the exposure problem.
- Focus precisely. Use eye-detection autofocus, a selected focus point, or magnified manual focus according to the subject and equipment.
- Review highlights and focus. Check the histogram, highlight warning, and the eyes at high playback magnification.
Open shade is often more flattering than direct midday sun. Moving the subject beside a building, tree, or large diffuser can reduce harsh shadows while preserving a bright background and shallow depth of field.
Workflow 2: Normal Flash Sync with an ND Filter
Most camera-and-flash combinations have a maximum normal synchronization speed. The exact value varies, but it is often around 1/160 to 1/250 second.
At that relatively slow shutter speed, a wide aperture may overexpose the bright background. An ND filter can reduce the incoming ambient light enough to keep the aperture open.
- Turn the flash off temporarily. Begin by establishing the ambient exposure.
- Set the shutter at or below normal sync speed. Confirm the exact limit in the camera and flash documentation.
- Choose aperture and ISO. Select the depth of field and image-quality settings before adding filtration.
- Measure the background exposure. Note how many stops it is brighter than the desired result.
- Add the required ND. Use a fixed filter or adjust a variable ND within its reliable working range.
- Add flash to the subject. Increase or decrease flash power, distance, or modifier position until the subject balances with the background.
- Check both exposures separately. Shutter speed mainly influences ambient light within normal sync conditions, while aperture, ISO, ND, flash power, and flash distance affect the flash-lit subject.
- Review color and reflections. Confirm that the ND filter has not introduced a strong cast or flare.
An ND filter reduces both ambient light and flash light reaching the sensor. A stronger filter may require more flash power, a closer light, a more efficient modifier, or a higher ISO.
Workflow 3: High-Speed Sync
High-speed sync allows a compatible external flash to operate at shutter speeds faster than the camera’s normal synchronization limit.
This can let the photographer use a wide aperture in bright sunlight without placing an ND filter on the lens. It is especially useful for mobile portraits when rapidly changing light makes filter changes inconvenient.
The main trade-off is reduced effective flash output and range. The flash emits a rapid series of pulses while the shutter opening travels across the sensor, so less light may reach the subject than during a normal single flash discharge.
Fast and Flexible
The photographer can use shutter speed to control bright ambient light without installing a strong ND filter.
Reduced Flash Reach
Higher shutter speeds can require the light to be moved closer, used without an inefficient modifier, or replaced with a more powerful unit.
ND Filter or High-Speed Sync?
| Situation | ND with normal sync | High-speed sync |
|---|---|---|
| Rapidly changing light | May require filter adjustment or replacement | Shutter speed can be changed quickly |
| Maximum flash reach | Normal flash operation can be efficient, but the ND also reduces flash exposure | Effective flash range decreases as shutter speed rises |
| Moving subject | Shutter is limited to normal sync, although flash duration may freeze selected movement | Fast shutter can help control ambient-recorded motion |
| Color consistency | Depends partly on the ND filter | No ND color cast when no filter is used |
| Simple lightweight setup | Requires a filter but may work with ordinary flash sync | Requires compatible HSS camera, trigger, and flash |
| Strong midday sun | Useful when adequate flash power is available | Useful when the flash can provide enough output at high shutter speed |
Both methods are valid. The better choice depends on flash power, subject distance, shooting speed, filter quality, camera compatibility, and the amount of ambient light.
Fixed ND or Variable ND for Portraits?
Fixed ND
- Provides one predictable density
- No variable-ND cross pattern
- Useful in stable lighting
- Requires changing filters when brightness changes
Variable ND
- Adjusts quickly as sunlight changes
- Useful for events, travel, and video
- May change reflections because of polarization
- Must be checked for uneven density and color at strong settings
A variable ND around 2–5 stops is a practical starting range for many portrait and hybrid photo-video situations. Extremely bright conditions or a high base ISO may require a stronger range.
Select the range based on measured exposure rather than assuming that maximum density is always better.
How Lens Choice Affects the Result
| Lens approach | Visual effect | Practical consideration |
|---|---|---|
| 35 mm with a wide aperture | Shows more environment while still allowing subject separation | Requires careful subject placement because more background remains visible |
| 50 mm with a wide aperture | Balanced perspective and useful blur for half-body or environmental portraits | A practical general-purpose portrait option |
| 85 mm with a wide aperture | Strong background separation and comfortable portrait perspective | Requires more working distance |
| 70–200 mm zoom | Strong apparent compression and smooth backgrounds at longer focal lengths | Needs substantial shooting distance and may be heavier |
A fast lens helps, but it is not the only solution. A slower zoom can still create an attractive soft background when the subject is close, the background is distant, and the longer end of the zoom is used carefully.
Focus Accuracy at Wide Apertures
The shallower the depth of field, the more visible a small focusing error becomes. This is particularly important for close portraits, moving children, animals, events, and windy outdoor locations.
Controlling Harsh Sunlight
Background blur does not automatically create flattering light. Direct overhead sun can produce deep eye shadows, bright foreheads, clipped skin highlights, and excessive contrast.
Useful lighting options include:
- Moving the subject into open shade
- Positioning the sun behind or beside the subject
- Using a reflector for subtle fill
- Using diffused flash to lift facial shadows
- Using a large diffusion panel when conditions and assistants permit
- Waiting for softer light when the schedule allows
Do not underexpose the face simply to protect an unimportant bright background. Decide which highlights matter, expose intentionally, and use lighting or a different angle when the scene exceeds the camera’s usable range.
Using ND Filters for Shallow-Focus Video
Video creators often choose shutter speed according to frame rate and desired motion rendering. For example, 25 fps is commonly paired with a shutter speed around 1/50 second as a creative starting point.
In bright sunlight, that shutter speed may overexpose the image at a wide aperture. An ND filter reduces the light while allowing the aperture and shutter speed to remain near the intended values.
- Select the frame rate. Choose it according to delivery format and motion requirements.
- Choose the shutter speed. Set the desired motion rendering before controlling brightness.
- Select the aperture. Decide how shallow the focus should be.
- Set the camera’s appropriate ISO. Account for the base ISO of standard or log recording profiles.
- Add or adjust ND. Increase density until highlights and skin tones fall within the intended exposure range.
- Lock white balance. Prevent color from drifting during a continuous shot.
- Review the full frame. Check variable-ND cross patterns, reflections, color shifts, and dark corners.
Common Mistakes to Avoid
Quick Pre-Shoot Checklist
Frequently Asked Questions
Does an ND filter create background blur?
No. The filter reduces light so a wide aperture can be used without overexposure. The blur itself comes from aperture, focal length, focusing distance, subject distance, and background distance.
Do I always need an ND filter for portraits in sunlight?
No. For natural-light photography, a sufficiently fast shutter speed may provide correct exposure at a wide aperture. ND is most useful when the camera’s shutter limit, flash sync, or video shutter requirement prevents that approach.
How many ND stops do I need at f/1.8?
There is no universal number. Meter the scene at the selected ISO and aperture, then compare the required shutter speed with the shutter speed you intend to use. The difference determines the required ND strength.
Is a 10-stop ND suitable for outdoor portraits?
It is usually stronger than necessary for ordinary portrait photography. A lighter fixed filter or moderate variable ND generally provides more practical shutter speeds and easier focusing.
Can I use flash through an ND filter?
Yes. Remember that the filter reduces the flash exposure as well as the ambient exposure, so the light may need more power, a shorter distance, a more efficient modifier, or a higher ISO.
Is ND better than high-speed sync?
Neither is always better. ND allows normal flash synchronization but also reduces the flash reaching the sensor. HSS avoids the filter but reduces effective flash range at high shutter speeds.
Why is my subject blurry even though the background looks good?
The shutter speed may be too slow, focus may have missed the eyes, or the subject may have moved outside the shallow focus plane. Use a faster shutter, continuous autofocus, or a slightly smaller aperture.
Which focal length is best for background blur?
There is no single best focal length. A 50 mm lens is versatile, while 85 mm and longer lenses can provide strong separation when enough working distance is available. Composition and background distance remain important.
Can a kit lens create a blurry background?
Yes. Use the longest practical focal length, move close enough for the intended framing, keep the subject far from the background, and use the widest available aperture.
Why does my variable ND create an X-shaped shadow?
The polarizing layers are being used near or beyond a practical maximum position. Reduce the density or change to a narrower-range variable ND or fixed filter.
Should I shoot every portrait at the widest aperture?
No. The widest aperture may leave part of the face, a second person, or important clothing outside the focus zone. Stop down enough to keep the required subject detail sharp.
How do I make the background even softer without buying another lens?
Move the subject farther from the background, move closer for a tighter composition, use the longer end of an existing zoom, and choose a background with distant highlights or simple shapes.
Final Recommendation
Start by creating physical separation between the subject and background, then choose the aperture and focal length that produce the desired look.
For natural-light portraits, use the shutter speed needed for correct exposure and add ND only when the camera cannot provide a suitable setting. For flash portraits, choose between normal synchronization with ND and high-speed sync according to flash power, working distance, and shooting pace.
Use the weakest ND strength that solves the exposure problem, verify focus on the eyes, and inspect the complete image for color cast, flare, uneven density, and clipped highlights before continuing the session.

The OptiFilter Labs Editorial Team creates practical, carefully researched content about ND filters, camera accessories, exposure control, photography techniques, and video production. Our goal is to help photographers and filmmakers understand their equipment, solve common problems, and make more informed purchasing decisions.