I often find that choosing between these two options is the most critical step for photographers who want control over how much light hits the sensor.
In my gear bag I weigh speed against precision. For travel shoots I rely on a compact set of variable filters for quick changes. When I work landscapes, I prefer the consistent quality of fixed filters.
Kase makes high-quality fixed filters that shine in stable lighting. I also trust brands that support causes I care about. Urth, for example, plants five trees for every purchase, which matters to me as I choose professional-grade gear.
Before you buy, I recommend testing each option on your camera to see how a filter variable or fixed variable solution changes your exposure and final image.
Key Takeaways
- Decide if you need fast adjustments or maximum image quality.
- Test how each option alters light on your camera before committing.
- Kase offers top-tier fixed filters for consistent results.
- Variable solutions work well for travel and changing conditions.
- Choosing sustainable brands like Urth adds environmental value.
Understanding the Role of Neutral Density Filters
Neutral density pieces are my go-to when bright light threatens to blow out a shot.
I use neutral density gear to reduce the amount light entering camera lens without changing color. This lets me hold a wide aperture in harsh sun or slow shutter speed for motion blur.
The reduction is measured in stops. A higher stop value blocks more light; for example, an ND1000 cuts about 10 stops of light. That math keeps exposure predictable when conditions change.
“Stops give you a clear way to control how much light enters the camera.”
- Control amount: I manage the amount light entering the sensor to shape depth of field and motion.
- Maintain quality: The right density filter preserves color and sharpness in bright light.
- Adapt to conditions: Different types help me keep consistent shutter speeds across scenes.
| Type | Typical Stops | Common Use |
|---|---|---|
| Low density | 1–3 stops | Portraits in bright light |
| Medium density | 4–6 stops | Wider apertures, mild motion blur |
| High density | 8–10+ stops | Long exposures, dramatic motion |
How Variable vs Fixed ND Filters Function
I think about mechanical design and how it changes exposure on the fly. This helps me choose the right tool for a scene and the right stops for long exposures. Below I break down how each approach controls light and why construction matters.
The Mechanics of Light Reduction
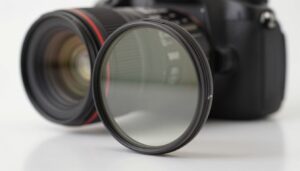
One common neutral density solution uses two polarizing glass layers that rotate to reduce the amount light entering camera. That rotation changes the overlap of polarizers and alters the stops available to me.

The Peter McKinnon Signature Edition II VND even adds haptic feedback, so I can feel each stop as I turn the ring. That tactile cue helps me lock exposure and keep a shallow depth field when I need it.
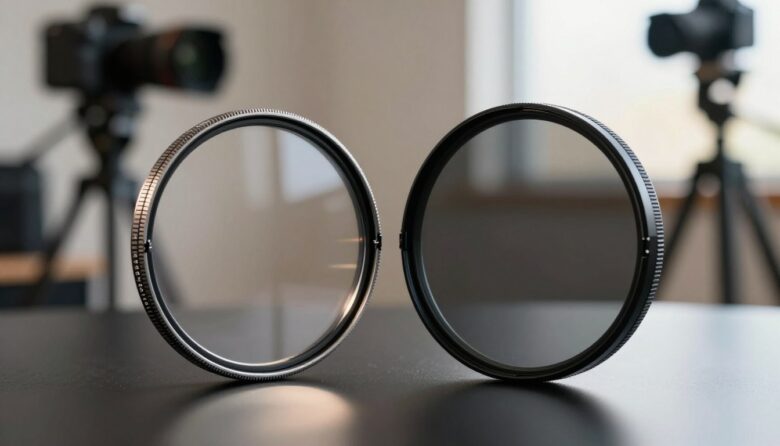
Comparing Construction and Design
In contrast, a single density filter is built to deliver one set stop value and simpler glass. The construction is less complex, and the optical quality can be more consistent across the frame.
- Two-layer design: lets me change exposure settings fast without swapping one filter.
- Single-density design: gives steady quality and predictable color.
- Practical trade-off: choose convenience for travel or consistency for landscapes.
| Design | Stops | Best for |
|---|---|---|
| Two polarizers | Variable stops | Run-and-gun, shallow depth |
| Single density glass | Set stops | Long exposures, studio |
| Hybrid/advanced | Indexed stops (haptic) | Precise control in the field |
“Understanding how a piece of glass alters light is where better exposures begin.”
The Case for Using Fixed ND Filters
For landscape work I reach for glass that guarantees consistent exposure and true color.
I prefer a fixed filter when I need the highest image quality in bright light. A good neutral density piece does not introduce polarization artifacts or strange color shifts. That reliability matters when I compose slowly and want each frame to match my vision.

Advantages for Landscape and Studio Photography
Fixed filters give me predictability. In the field, I use set stops so my shutter speed and aperture stay exactly where I want them.
In the studio, I keep a set of fixed filters at hand to swap quickly and lock exposure across a shoot. That consistency helps me match shots and maintain quality from frame to frame.
- I prefer a fixed filter for landscapes because it preserves color and sharpness in bright light conditions.
- A fixed filter controls the amount light entering the camera lens without cross-polarization risks.
- Every fixed filter I own helps me manage stops light and get the exact shutter speed and aperture I plan.
“Using one reliable density filter removes guesswork and helps me create images with consistent tone and detail.”
Exploring the Benefits of Variable ND Filters
When the sun shifts every few minutes, I reach for a tool that lets me change stops without missing a shot. In this section I cover why a one-piece solution can speed up work and how to avoid common problems.
Flexibility in Changing Light
I value fast control because changing light can ruin a take. A variable filter gives me a range of stops so I can tweak exposure on the fly.
That means I can adjust shutter speed and aperture immediately and hold a shallow depth field while the scene evolves.
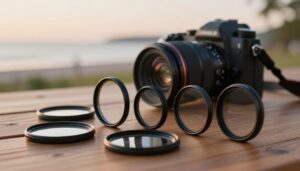
Convenience for Travel
One filter replaces many, which keeps my bag light and my setup quick. For travel and documentary work, that convenience is a real advantage.
- I carry a single unit that covers multiple density choices.
- I change settings faster and capture moments I would otherwise miss.
- The Peter McKinnon Mist Edition II adds diffusion for a soft, dreamlike look when I want it.
Managing Potential Image Artifacts
Not all pieces are equal. High quality builds reduce color shifts and cross-polarization patterns that spoil image quality.
I always test a unit on my camera and lens to check for artifacts at extreme stops. That simple step saves time and keeps final footage professional.
“A well-made variable filter gives you creative freedom without constant swapping.”
Choosing the Right Filter for Your Specific Workflow
Certain shoots demand speed and others demand absolute image quality. I match the tool to the job: fast-changing scenes call for agility, planned shoots call for precision.
If I need quick adjustments on set, I keep one variable filter on hand. It saves time and helps me maintain my aperture and shutter speed as light shifts.
For studio and landscape work, I reach for a fixed filter set. Those give me consistent color and the highest optical quality when I can control conditions.
“Evaluate your workflow first — convenience or consistency will guide your choice.”
- I recommend testing both types on your camera before committing to a purchase.
- For run-and-gun work, a single variable filter streamlines settings changes.
- For planned shoots, a set of fixed filters preserves image quality across frames.
- Keeping both on hand covers different types of light and conditions without compromise.
Final Thoughts on Selecting Your ND Filter
A photographer’s workflow improves the moment gear stops getting in the way of creativity.
I recommend matching gear to how you shoot. Choose a single unit when you need rapid changes and a set when you demand top image quality. This balance helps you control exposure and keep your camera work consistent in strong light.
Investing in quality pays off. A good variable filter or a reliable fixed filter will lift the overall quality of your images and give you creative freedom without constant swapping.
Focus on convenience, test options on your kit, and pick what preserves your vision. The right filter will let you experiment confidently and capture the shot you imagined.
FAQ
What is the main purpose of neutral density filters?
I use these glass elements to reduce the amount of light entering the camera so I can control exposure without changing aperture or ISO. They let me use slower shutter speeds for motion blur or wider apertures for shallow depth of field in bright conditions.
How does a one-piece variable neutral density filter work compared to a single-strength density filter?
A rotating polarizing element inside the filter changes the effective density, allowing me to dial in different stops of light reduction with a single unit. A single-strength model offers a fixed amount of attenuation, so I swap sizes if I need more or less light control.
When should I choose a single-strength filter over an adjustable one?
I pick a single-strength option when I need the highest optical quality and consistent performance for landscape or studio work. It’s reliable for long exposures and avoids certain image artifacts that can appear with adjustable designs.
What advantages does an adjustable filter give me while traveling or shooting run-and-gun?
I value the convenience of carrying one piece that covers a range of stops. It saves space in my bag and speeds up workflow when light changes quickly, letting me adjust exposure without swapping elements or glass holders.
Do adjustable filters introduce any image quality problems I should worry about?
Yes, in some conditions I see issues like uneven darkening, cross-polarization patterns, or slight color shifts, especially at the strongest settings. Good brands minimize these, but for critical work I often revert to a single-strength option.
How many stops of light reduction do typical options provide?
Single-strength pieces commonly come in values like 3, 6, or 10 stops. Adjustable units usually cover a range—for example, 1 to 8 stops—letting me choose anywhere within that span rather than a single fixed value.
Can I achieve shallow depth of field in bright sun with either type?
Yes. Both let me keep a wide aperture for shallow depth while controlling exposure. I tend to use an adjustable unit for quick changes and a fixed one when I need absolute optical consistency for still subjects.
How do these tools affect shutter speed choices for motion blur photography?
By cutting light, they let me slow shutter speeds dramatically—handy for silky water or motion trails. I plan the needed stops beforehand: more attenuation equals longer exposures without overexposure.
Are there compatibility or mounting concerns I should know about?
I check thread size and stacking limits. Some wide-angle lenses risk vignetting with thick holders, so slim-profile designs or step-up rings help. Also, stacking multiple pieces can cause corner darkening or optical issues.
How do I decide which option fits my workflow best?
I weigh image quality needs, portability, and speed. If I prioritize pristine optical results for landscapes or studio setups, I choose single-strength. If I need flexibility and fewer items on location, I go with an adjustable unit.
Can I mix these types in my kit for different scenarios?
Absolutely. I keep a couple of single-strength pieces for critical shoots and an adjustable option for travel or fast-changing light. That combination covers most situations without carrying every size.
What brands make reliable options I can trust?
I look to established manufacturers like B+W, Hoya, Tiffen, Lee, and Formatt-Hitech for consistent quality. Each offers models that prioritize either optical purity or convenience, so I compare samples before buying.